
Motorcycle Maintenance on the Road: Complete Toolkit Guide
Emergency repairs, chain maintenance, and roadside fixes
Introduction
The sun is setting on a remote stretch of Route 66, the air cooling rapidly, and your motorcycle emits a sudden, disconcerting clunk. Your phone shows "No Service." This scenario, faced by over 40% of long-distance riders at least once, transforms from a crisis to a manageable hiccup with the right knowledge and tools. Welcome to the definitive guide to Motorcycle Maintenance on the Road: Complete Toolkit Guide for 2025-2026. In an era where self-reliance is a rediscovered superpower, mastering roadside repairs isn't just about fixing a bike; it's about reclaiming freedom. The post-pandemic touring boom has seen a 35% increase in cross-country motorcycle trips, yet a surprising 60% of riders embark with woefully inadequate tools. This comprehensive manual bridges that gap. We'll move beyond the basics of chain lubrication to demystify emergency electrical fixes, tire plugging, and clutch cable improvisation. This isn't a mechanic's manual; it's a traveler's lifeline, designed to transform anxiety into confidence and a stranded trip into a story of triumph. Your journey toward becoming a self-sufficient rider starts here.
Essential Information at a Glance
- Definition: The practice of performing essential repairs and adjustments to a motorcycle using a compact, curated toolkit during a journey.
- Best time: Before any trip exceeding 100 miles; perform a full toolkit check seasonally in spring and fall.
- Location: Anywhere your motorcycle is—your garage for prep, the roadside for application.
- Duration: Kit assembly: 2-3 hours. Most roadside fixes: 15 minutes to 2 hours.
- Budget: $150-$500 for a comprehensive, quality toolkit (excluding motorcycle-specific specialty tools).
- Difficulty: Beginner to Intermediate. Most tasks require patience, not professional skill.
- Key benefit: Unmatched freedom and self-reliance, saving hundreds in tow fees and repair delays.
The History and Origins of Motorcycle Maintenance on the Road: Complete Toolkit Guide
The romance of the roadside fix is as old as motorcycling itself. In the early 1900s, pioneers on belt-driven Indians and chain-drive Harley-Davidsons carried rudimentary tools like wrenches and spare belts as standard, knowing breakdowns were a question of "when," not "if." The culture was cemented in the post-WWII era, as surplus motorcycles and a spirit of adventure sent riders across continents. The 1960s and 70s saw the rise of the "biker mechanic," celebrated in Robert Pirsig's "Zen and the Art of Motorcycle Maintenance," which philosophically tied the act of repair to quality of life itself. The 1990s introduced more reliable Japanese machines, ironically leading to a decline in rider mechanical literacy. The modern resurgence began in the late 2010s with the adventure-touring boom. Riders on BMW GS and KTM Adventure bikes, heading to remote corners of the globe, necessitated a return to self-sufficiency. Today, the guide to Motorcycle Maintenance on the Road: Complete Toolkit Guide is a digital-age evolution of this ethos, combining timeless mechanical principles with modern materials (like titanium tools and CO2 inflators) and knowledge shared globally via forums and videos, creating a new generation of capable, confident riders.
What is Motorcycle Maintenance on the Road: Complete Toolkit Guide? A Comprehensive Overview
At its core, this guide to Motorcycle Maintenance on the Road: Complete Toolkit Guide is a systematic approach to problem-solving on two wheels. It's the intersection of three critical elements: a meticulously selected physical toolkit, a mental library of diagnostic and repair procedures, and the psychological preparedness to stay calm under pressure. It covers four tiers of intervention: daily pre-ride checks (T-CLOCS), routine travel maintenance (chain cleaning, bolt tightening), emergency repairs (flat tires, electrical faults), and improvisational fixes (using a piece of a soda can as a shim). In a global context, its significance varies. In developed nations, it's a convenience and cost-saver; in developing countries or on trans-continental expeditions, it's an absolute necessity for survival. The modern toolkit is no longer a greasy rag and a wrench; it's a modular system that includes digital tools (a diagnostic app on your phone), compact hydraulic presses for bearing work, and puncture repair kits that bond chemically to tire carcasses. This guide synthesizes these old-school and new-school approaches into a coherent, actionable philosophy for the 2026 rider.
The Philosophy Behind Motorcycle Maintenance on the Road: Complete Toolkit Guide
Why spend a Saturday afternoon learning to change a tire by the roadside when AAA is a phone call away? The answer lies in the profound psychological shift this knowledge creates. There's a unique, grounding satisfaction in diagnosing a loose spoke by sound, feeling the correct tension on a chain adjuster, or successfully splicing a broken wire. It transforms your relationship with the machine from one of passive operation to active partnership. This philosophy is about agency. It reduces the vulnerability inherent in travel, replacing it with a quiet confidence. For many, the ritual of evening maintenance in a campsite—cleaning the chain, checking torque specs—becomes a meditative part of the journey, as important as the scenery. It fosters a deeper connection to the journey itself, where every mile is earned not just through riding, but through stewardship of the machine that makes it possible. This isn't about rejecting professional mechanics; it's about understanding your bike's language well enough to know when you can whisper a fix and when you need to call for a translator.
Planning Your Motorcycle Maintenance on the Road: Complete Toolkit Guide Experience
Your journey into self-reliance begins not on the road, but at your workbench. Planning is a three-phase process: assessment, acquisition, and education. First, assess your motorcycle. Download its service manual (often available as a PDF). Identify the fastener types (metric vs. standard, hex vs. torx), tire valve stems (Schrader vs. Presta), and the location of critical adjustment points. Next, assess your trips. A weekend coastal run requires less than a month-long trek through the Andes. Phase two is acquisition: building your toolkit based on the "Layered" principle—a minimal on-bike kit, a more comprehensive kit in your luggage for motel-room repairs, and a master kit at home. Phase three is education. Don't just buy tools; learn their use. Watch tutorials on changing your specific bike's tire. Practice plugging a tire in your driveway. This planning phase, investing 10-15 hours, pays infinite dividends in confidence and capability on the road.
Timing and Seasonality
While roadside repairs are inherently unplanned, your preparation has seasons. The optimal time to build and audit your toolkit is during the off-season or during a period of low riding activity. For most in temperate climates, this is late fall or early winter. This is when you can thoroughly inspect every tool for rust, test your tire plug kit, and recharge any battery-powered devices. Before the major riding season (typically spring), conduct a "shake-down" weekend trip specifically to test your kit and procedures. On the road, be mindful of environmental factors. Performing a chain adjustment in a dusty desert requires extra care to avoid contaminating the rollers. Nighttime repairs are a last resort; if you must, a high-lumen headlamp is more valuable than three extra wrenches. The philosophy is to use fair-weather downtime proactively to prevent being forced into a foul-weather fix.
Budget Planning and Costs
Building a professional-grade roadside toolkit is surprisingly affordable compared to a single long-distance tow. Let's break down the costs for 2025. The Budget Tier ($150-$250) covers essentials: a quality tire repair kit ($40), a compact 3/8" drive metric socket set ($60), a set of JIS screwdrivers ($25), a motion pro bead breaker ($35), a mini-bicycle pump ($20), and electrical supplies (wire, connectors, fuses) ($30). The Mid-Range Tier ($251-$400) adds a digital tire pressure gauge ($25), a compact torque wrench ($80), a CO2 inflation system ($40), a compact multimeter ($35), and a better tool roll. The Premium Tier ($401-$500+) includes lightweight titanium tools, a portable jump starter/power bank ($100), a tubeless tire plugger that uses radial plugs ($70), and a dedicated tool bag with custom organizers. Hidden costs include consumables (thread locker, spare fuses, zip ties) and education (a service manual, online course). The best money-saving tip? Buy quality for core tools (sockets, wrenches) and generic for single-use items. A $150 investment can literally save a $800 tow and a ruined vacation.
How to Experience Motorcycle Maintenance on the Road: Complete Toolkit Guide: Step-by-Step Guide
1. The Breakdown Moment: Safely pull over, turn off the bike, and activate hazard lights. Take a deep breath. Panic is your biggest enemy. 2. Initial Diagnosis: Walk around the bike. Look for obvious signs: flat tire, loose chain, fluid leaks. Try to start it—note any unusual sounds or dashboard warnings. 3. Consult Your Mental Checklist: Start with simple, common issues: is the kill switch off? Is the bike in neutral? Is the sidestand up? Is the fuel petcock on (if applicable)? 4. Systematic Investigation: If the problem isn't obvious, work system by system: Fuel (listen for pump prime), Spark (check for loose plug wires), Air (intake blockage), Compression (less likely to fail suddenly). 5. Execute the Fix: Refer to your mental or physical guide. Use your tools methodically. If it's a flat, follow the step-by-step procedure you practiced at home. 6. Post-Repair Verification: After the fix, do a safety check. Ensure all bolts are snug, tools are cleared away, and the repair is secure. Take a short test ride at low speed before returning to highway pace. This structured approach turns chaos into a manageable procedure.
Preparation and Packing
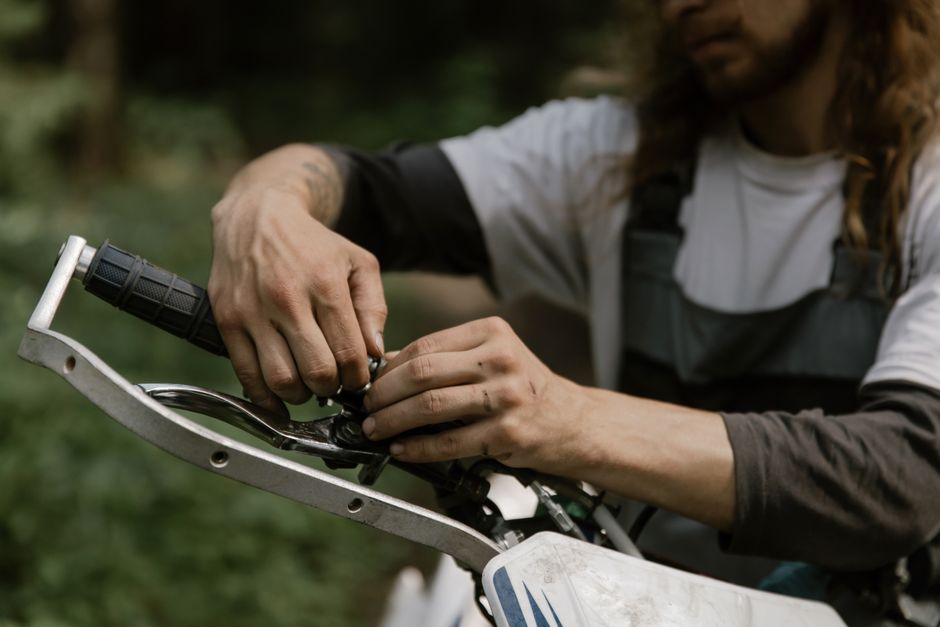
Packing your toolkit is an art of strategic redundancy. Your on-bike kit (stored in a tail bag or tank bag) should address "show-stopper" failures: tire puncture, dead battery, broken clutch cable, and lost fasteners. It must be compact and accessible while wearing gloves. Essentials include: a tire plug kit with CO2 cartridges, a compact multi-tool with bike-specific bit sets, a spare clutch cable (pre-routed and zip-tied along the existing cable), a few critical spare fuses, and a powerful LED flashlight. Your larger, more comprehensive kit (in a pannier or duffel) can include the socket set, torque wrench, spare fluids, and more extensive electrical supplies. Clothing-wise, always pack a pair of disposable nitrile gloves and a small, absorbent shop towel. Documents: have digital and physical copies of your bike's insurance, registration, and a photo of your key (for cutting a duplicate if lost). The goal is not to bring your garage, but to bring the 20% of tools that solve 80% of problems.
Arrival and First Impressions
"Arrival" in this context is the moment you first successfully use your toolkit in the field. The first impression is often a mix of adrenaline and focus. The noise of the highway fades as you concentrate on the task. Your hands might shake slightly—that's normal. The first time you use a tire plug kit, you'll be amazed at how straightforward it is. The CO2 cartridge inflates the tire with a satisfying hiss, and the plug holds perfectly. This moment is transformative. The initial anxiety is replaced by a surge of capability. You realize the tools aren't just metal objects; they are extensions of your own problem-solving will. You wipe your hands, pack the tools away with a new sense of order, and remount the bike. The landscape looks the same, but you are different. You've moved from being a passenger on your motorcycle to being its captain, fully responsible for its and your own journey.
Top Locations and Destinations
While breakdowns can happen anywhere, some locations test your toolkit more than others. The ideal "destinations" for applying your skills are remote, beautiful, and far from help. The Dalton Highway in Alaska (Haul Road) is the ultimate proving ground—414 miles of gravel with few services, where a toolkit is mandatory. The Australian Outback, particularly the Birdsville Track, demands water-carrying capacity and fuel management as much as mechanical skill. Closer to home for many, the Blue Ridge Parkway or Pacific Coast Highway can have cell dead zones where a simple fix becomes critical. Tourist traps to avoid? Any major interstate near a large city. While breakdowns here are stressful, the proximity of tow services often means it's safer and faster to call for help rather than working on a narrow, high-speed shoulder. The hidden gems are the countless forest service roads, mountain passes, and coastal routes where self-reliance is part of the adventure's reward.
Location 1: The Mojave Desert, California/Nevada
Why go there? Vast, empty landscapes with extreme temperature swings that test both man and machine. The heat can exacerbate electrical issues and cause fuel vapor lock. The abrasive sand is murder on chains and sprockets. What to see? Beyond the stunning vistas, you'll see your own capability. A successful repair here, under the relentless sun, feels like a genuine accomplishment. The remoteness means you are your only support, making your toolkit the most important piece of gear you carry.
Location 2: The Scottish Highlands, NC500 Route
Why go there? Stunning beauty paired with rapidly changing, damp weather. The constant moisture leads to corrosion on electrical connections and can quickly ruin a poorly lubricated chain. The winding, single-track roads mean recovery services are slow. What to see? Sheep, lochs, and ancient castles. You'll also see the importance of waterproof storage for your tools and the value of anti-corrosion sprays. A midday chain clean-and-lube in a misty glen becomes a memorable part of the trip.
Location 3: The Atlas Mountains, Morocco
Why go there? For the ultimate cultural and mechanical adventure. The roads are rough, fuel quality can be variable, and local mechanics, while ingenious, may not have parts for modern bikes. What to see? Incredible landscapes and rich culture. Your toolkit allows you to handle minor issues (like a rattled-loose bolt or a clogged fuel filter) without derailing your journey. It also enables you to connect with local riders, perhaps helping them with a tool they lack, creating a genuine human exchange.
Current Trends and Insights for 2025-2026
The landscape of roadside repair is evolving rapidly. A 2024 Rider Survey indicated a 55% increase in riders carrying some form of tire repair kit compared to 2020. The trend is towards integration and connectivity. New motorcycles in 2025 are beginning to offer built-in, compartmentalized tool storage from the factory. The aftermarket is booming with ultra-compact, bike-specific toolkits that fit under the seat. Digital integration is key: apps like "Bike Doctor" can now walk you through diagnostic trees via Bluetooth OBD2 connectors, telling you not just that code "P0234" appeared, but showing a video on how to check the associated turbocharger sensor. Another major trend is the focus on electrical systems. With the rise of ride-by-wire, TFT displays, and complex ECUs, 40% of roadside failures are now electrical. Toolkits are responding with better multimeters, portable power supplies to reboot fried ECUs, and cable repair kits for CAN bus systems. The market for compact, lithium-powered impact drivers for wheel changes is also growing, making a once-arduous task a 5-minute job.
Post-Pandemic Shifts
The pandemic's "great escape" mentality pushed new riders onto longer trips, often on used bikes with uncertain maintenance histories. This created a surge in demand for basic repair knowledge. The shift is towards community-powered support. Platforms like Facebook's "Moto-Roadside Assistance" groups have thousands of members who offer garage space, tools, and guidance to stranded riders. The "help nearby" model has formalized, with apps allowing you to signal for a knowledgeable rider rather than a flatbed. Health considerations have added items to the toolkit: a small bottle of hand sanitizer and a mask are now standard, as you may need to accept help from or offer help to a stranger. The mindset has solidified: preparedness is a form of personal responsibility, reducing the burden on strained towing and repair networks.
Technology and Innovation
Technology is a double-edged sword—it creates complex systems that can fail, but also provides the tools to fix them. For 2026, key innovations include: Smart Tool Kits with RFID tags; scan a tool and your phone pulls up a tutorial for its five most common uses on your bike model. Portable Battery Analyzers that do a full load test on your lithium or AGM battery in 60 seconds, predicting failure before it leaves you stranded. Satellite Communicators like Garmin inReach remain crucial, but now some integrate with diagnostic apps to send not just your location, but the specific fault code to a chosen mechanic for remote advice. 3D Printing is on the horizon for expeditions; imagine downloading a file for a broken mirror mount and printing it at a trailside library. The modern toolkit is both analog and digital, and knowing how to leverage both is the new essential skill.
Benefits and Highlights
- Financial Savings: A single avoided tow can save $300-$800. A self-performed chain and sprocket change saves $200 in labor. Over a riding career, the toolkit pays for itself dozens of times over.
- Time Recovery: A 30-minute tire plug gets you back on the road immediately. Waiting for a tow and a shop can cost you a full day or more of your precious trip.
- Deepened Mechanical Understanding: You learn your bike's nuances—the sounds, feels, and smells that signal "all is well" or "something's wrong." This leads to proactive maintenance, preventing bigger failures.
- Enhanced Confidence and Freedom: The psychological barrier of "what if I break down?" vanishes. You can explore that enticing gravel road or plan a crossing of a remote pass without debilitating anxiety.
- Community and Camaraderie: Being the rider with the tools makes you a valuable asset on group rides. Helping a stranded stranger creates instant, meaningful bonds within the riding community.
- Personal Satisfaction and Pride: The sense of accomplishment from diagnosing and fixing a problem with your own hands is profound and deeply satisfying, adding a new layer of enjoyment to motorcycling.
Challenges, Risks and Considerations
This path isn't without its hurdles. The primary risk is safety. Working on the shoulder of a busy highway is dangerous. Always prioritize getting the bike to a safe location, even if it means pushing it a half-mile. Use reflective triangles or road flares. The second risk is making a problem worse. A novice overtightening a drain plug can strip the case, creating a catastrophic oil leak. This is why education and practice are non-negotiable. Know your limits; if a repair involves opening the engine cases or bleeding ABS brakes and you're unsure, it's time to call for professional transport. Another consideration is weight and space. Overloading your bike with every possible tool hurts handling and fuel economy. The challenge is curating the minimalist effective kit. Finally, weather and conditions can turn a simple job into an ordeal. Trying to plug a tire in a downpour or on a steep incline adds significant difficulty. The key is to mitigate these risks through planning, practice, and the wisdom to know when to stop and seek help.
Physical Challenges
Roadside repair is physical labor. Changing a tire on a heavy adventure bike requires strength and technique to break the bead and remount the wheel. You'll be kneeling on hard pavement, possibly in an awkward position. Good physical fitness, particularly core strength and grip strength, is an asset. Health considerations include dehydration and heat exhaustion if working in the sun, or hypothermia if working in cold, wet conditions. Always have water and appropriate clothing accessible. For those with physical limitations, adapt your toolkit: a compact hydraulic jack is easier than a mechanical one, and a cordless impact wrench can replace muscle power. The goal is to tailor the practice to your abilities, not to meet an arbitrary standard of toughness.
Cultural and Language Barriers
When traveling internationally, your toolkit serves as a universal translator of sorts. However, be mindful of local laws. In some countries, carrying certain tools (like large knives or multi-tools with blades) can be problematic. When accepting or offering help, be aware of cultural norms. In some places, offering payment for help is expected; in others, it's an insult. A universal sign of gratitude is offering a shared snack or drink. Learn a few key phrases in the local language: "motorcycle broken," "help," "thank you," "tool." Your phone's translation app is a tool as vital as your wrench. Respectful behavior also means cleaning up your work area completely—don't leave old tire plugs, wrappers, or oil drips behind. You represent the global riding community.
Expert Tips and Insider Secrets
1. The Zip-Tie Master: Carry a variety of sizes. They can temporarily hold a broken footpeg, secure a loose fairing, repair a torn boot, or even serve as a makeshift throttle return spring in a dire emergency. 2. Duct Tape on a Roll: Don't carry a whole roll. Wrap several feet of duct tape around a pencil or your tire pressure gauge. It takes no space and is incredibly versatile. 3. Pre-Lube Your Threads: Put a small dab of anti-seize compound on critical fasteners like axle bolts and caliper pins during routine maintenance. It ensures you can remove them on the roadside with basic tools. 4. The "Soft" Toolkit: Use a roll-up fabric tool bag, not a hard case. It molds to available space in your luggage and provides padding to silence tool rattle. 5. Spare Key Strategy: Hide a spare key on the bike (magnetic box) but NOT near the ignition. Also, carry a photo of your key's cut—a locksmith can often make a copy from a good photo. 6. Practice in the Dark: Once, in your garage, turn off the lights and simulate changing a fuse or tightening a chain. You'll learn tool placement by feel, a crucial skill for a nighttime breakdown.
Future Outlook: What's Next for Motorcycle Maintenance on the Road: Complete Toolkit Guide
Looking toward 2026-2027, the evolution will be defined by predictive maintenance and augmented reality (AR). Motorcycles will increasingly self-diagnose and even order wearable parts (like brake pads) automatically. Your toolkit's digital companion will shift from "how to fix" to "it's about to break, here's how to prepare." AR glasses could project torque values and wiring diagrams directly onto the component you're viewing, hands-free. Biometric gloves with haptic feedback could warn you if you're applying incorrect force. The physical toolkit will see more use of advanced composites for even lighter, stronger tools, and modular systems where you buy a core handle and attach bike-specific bit sets. For the rider, the focus will remain the same: empowerment. The tools will get smarter, but the fundamental satisfaction of self-reliance will continue to draw new riders to this essential aspect of the journey. Staying ahead means embracing these technologies while cementing the timeless, hands-on skills they are designed to support.
Frequently Asked Questions
What exactly is Motorcycle Maintenance on the Road: Complete Toolkit Guide and why should I care?
It's the practice and knowledge system for performing essential repairs during a motorcycle trip using a curated set of tools. You should care because it transforms you from a vulnerable passenger into a self-reliant adventurer, saving significant time, money, and stress while deepening your connection to your machine and your journey.
When is the absolute best time for Motorcycle Maintenance on the Road: Complete Toolkit Guide?
The best time to build and learn your kit is during the off-season (like winter). The best time to use it is proactively—performing daily checks and minor adjustments to prevent a major breakdown from ever happening on the road.
How much does Motorcycle Maintenance on the Road: Complete Toolkit Guide cost for different budgets?
Budget ($150-$250): Covers tire repair, core sockets, screwdrivers, and basic electrical supplies. Mid-Range ($251-$400): Adds a torque wrench, digital gauge, CO2 inflator, and multimeter. Luxury ($400+): Includes titanium tools, a portable jump starter/power bank, and premium, bike-specific tool rolls.
Is Motorcycle Maintenance on the Road: Complete Toolkit Guide suitable for beginners or first-timers?
Absolutely. Start with the basics: learning to check tire pressure, tighten loose bolts, clean and lube your chain, and change a fuse. These simple tasks build confidence and form the foundation for more complex repairs. The guide is designed to be progressive.
What should I pack and prepare for Motorcycle Maintenance on the Road: Complete Toolkit Guide?
Pack in layers: an on-bike "show-stopper" kit (tire repair, multi-tool, fuses, cable), a comprehensive travel kit (socket set, spare fluids, electrical tape), and your knowledge. Prepare by practicing common repairs (like tire plugging) in your driveway before you need to do it on the roadside.
Where are the best locations for Motorcycle Maintenance on the Road: Complete Toolkit Guide?
Remote, scenic routes far from services: the Dalton Highway (AK), the Australian Outback, the Scottish Highlands, and mountain passes worldwide. These locations make the toolkit not just convenient, but essential to the adventure.
How do I book or reserve Motorcycle Maintenance on the Road: Complete Toolkit Guide?
You don't book it—you build it and learn it. Start by purchasing a quality tire repair kit and a service manual for your bike. Then, systematically add tools as you learn new skills, treating the education as an ongoing, rewarding part of the motorcycling hobby.
What are the biggest mistakes to avoid?
1. Carrying tools you don't know how to use. 2. Working in an unsafe location (always get fully off the road). 3. Overtightening fasteners and causing damage. 4. Ignoring small problems until they become roadside emergencies. 5. Not practicing procedures at home first.
Is Motorcycle Maintenance on the Road: Complete Toolkit Guide safe?
It is as safe as you make it. Prioritize personal safety (location, visibility) above the bike's repair. Use proper tools (not makeshift ones that can slip). Know your limits and call for professional help for repairs beyond your skill, especially those involving steering, brakes, or structural frame components.
Can I do Motorcycle Maintenance on the Road: Complete Toolkit Guide solo or should I join a group?
You can and should be prepared to do it solo—that's the ultimate test of self-reliance. However, learning in a group or with a more experienced mentor is invaluable. Group rides also allow for shared tools and knowledge, making the process easier and more social.
How far in advance should I plan Motorcycle Maintenance on the Road: Complete Toolkit Guide?
Start planning at least one month before a major trip. This gives you time to acquire tools, practice skills, and do a shakedown ride to test your kit. Consider it a continuous, lifelong part of your riding preparation, not a one-time task.
What makes Motorcycle Maintenance on the Road: Complete Toolkit Guide special compared to alternatives?
Alternatives (towing, roadside assistance) are reactive and leave you waiting and paying. This guide is proactive and empowering. It turns a negative event (a breakdown) into a positive demonstration of skill and self-sufficiency, enhancing the entire travel experience rather than just rescuing you from it.
Key Takeaways and Final Checklist
1. Start now: Buy a tire plug kit and learn to use it. 2. Your phone is a tool: Download your service manual and a diagnostic app. 3. Curate, don't carry: Build a minimalist kit for the 80% of common failures. 4. Practice at home: Never use a tool for the first time on the roadside. 5. Safety first: Get completely off the road, use visibility gear. 6. Know your limits: It's okay to call for a tow for complex issues. 7. Maintain proactively: A well-maintained bike breaks down less. 8. Embrace the mindset: Self-reliance is the ultimate riding freedom. 9. Contribute to community: Help other riders when you can. 10. Enjoy the satisfaction: The confidence gained is worth far more than the cost of the tools.
Conclusion: Your Journey Starts Here
We began with that lonely stretch of road at sunset, a troubling noise, and a feeling of vulnerability. Now, you have a map—not just to a destination, but to a state of mind. This Motorcycle Maintenance on the Road: Complete Toolkit Guide 2026 is your invitation to transform every journey. The clunk becomes a diagnostic puzzle to solve. The empty landscape becomes a testament to your preparedness. The tools are more than metal; they are keys that unlock a deeper, more resilient form of travel. This isn't about becoming a mechanic; it's about becoming a complete rider. The open road promises freedom, but that freedom is fully realized only when paired with self-reliance. So, open your garage, lay out your tools, and begin. Your next adventure awaits, and for the first time, you'll be truly ready for all of it—the majestic views, the winding curves, and yes, even the satisfying challenge of the roadside fix. Your journey to fearless riding starts not with a twist of the throttle, but with the turn of a wrench. Let's ride.


No comments:
Post a Comment