Why Your Next Trip Deserves the Perfect Travel Backpack (And How to Find It)
Your backpack is the single most important piece of gear for any journey. Choose wisely.
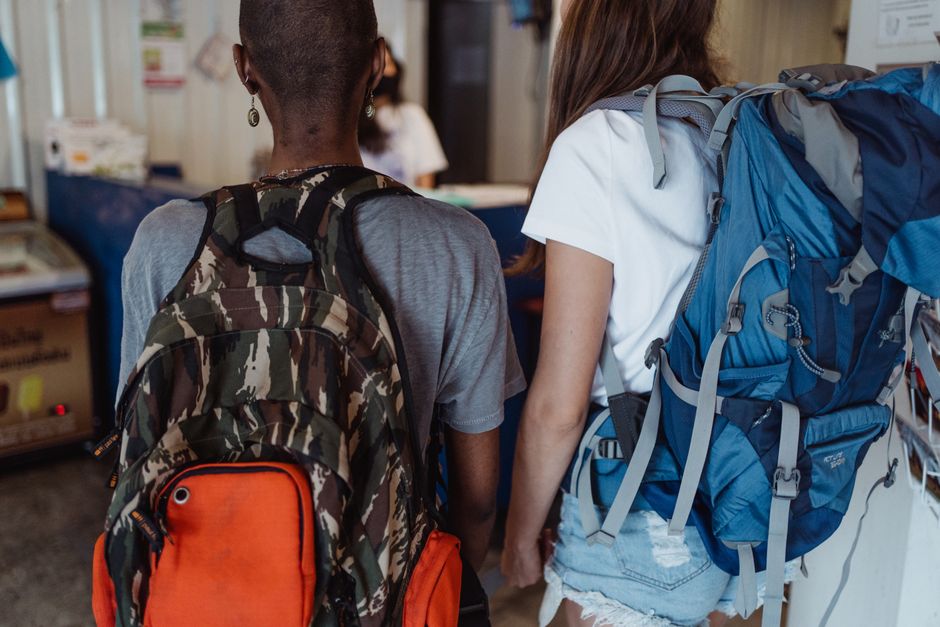
Quick Snapshot for Backpack Shopping
✈️ Best time to buy: End-of-season sales (August or February)
💰 Estimated budget: $80–$350 (mid-range sweet spot at $120–$200)
⏱️ How long to research: 2–3 hours of hands-on testing in a store
🎯 Difficulty level: Easy (once you know your body and trip type)
📍 Recommended season: Year-round, but test with your planned climate layers
👥 Best for: Solo travelers, digital nomads, weekend hikers, and families
Introduction
I still remember the first time I bought a travel backpack purely by looks. It was a sleek, dark-green pack with shiny zippers and a cool brand patch. I took it to Thailand for a month, and by day three, my shoulders were screaming. The hip belt dug into my waist, the back panel made me sweat like I was in a sauna, and every time I squatted to pick something up, the frame pressed into my spine. That pack ended up abandoned in a hostel corner in Chiang Mai, replaced by a cheap nylon duffel that served me better for the rest of the trip. That mistake taught me more than any blog post ever could: the right backpack isn't a fashion statement—it's a relationship with your body and your journey.
I’ve spent the last eight years testing backpacks across six continents, from the cobblestones of Prague to the dusty trails of Patagonia. I’ve carried packs through monsoon rains in Vietnam and sub-zero nights in the Rockies. I’ve had zippers fail at the worst moments, and I’ve worn one pack so long the hip belt molded to my hips like a custom seat. I’m not a gear reviewer with a lab coat—I’m a traveler who learned the hard way. This guide is born from sweat, lost luggage, and late-night hostel packing sessions. I’ll walk you through exactly how to choose a backpack that fits your body, your itinerary, and your budget—without the fluff.
The Essentials at a Glance
- 🎒 Fit comes first: A pack that doesn’t fit your torso length will hurt no matter how many straps you tighten. Measure your back before you buy.
- 🧳 Size matters more than brand: For most trips, 40–50 liters is the sweet spot. Anything over 60L rarely gets used fully and invites overpacking.
- 💧 Material is your second skin: Ripstop nylon (210D to 420D) offers the best balance of weight and durability. Avoid cheap polyester below 150D for serious travel.
- 🔒 Security features are a bonus, not a reason: Lockable zippers and hidden pockets add peace of mind, but a good padlock works on any zipper.
- 🧹 Test the suspension system: A pack with an adjustable torso length and a load-lifter strap makes a massive difference when you’re carrying 15+ pounds.
The Complete Guide
Why This Matters / Why You Should Choose Carefully
Your backpack is the only thing you carry that touches your body every single minute you’re moving. A bad pack turns a dream trip into a physiotherapy bill. I’ve seen travelers crying in train stations because their shoulders were in agony, watching their pack get checked because they couldn’t fit it in the overhead bin, or struggling to find a water bottle pocket while juggling a passport. The wrong choice can ruin your trip faster than a lost flight. The right choice makes everything easier—you walk faster, pack more efficiently, and feel lighter even when the weight is real.
This isn’t about getting the most expensive pack. It’s about matching the pack to your specific needs: Where are you going? What are you carrying? How long are you staying? A backpack for a week in hostels is different from one for a year of van life. I’ve seen travelers haul 70-liter military-style packs for a weekend city break—and they regret every step. Conversely, I’ve seen people bring a tiny 25-liter daypack on a winter trek and freeze. The right pack adapts to you, not the other way around.
When to Buy (Seasonal Guide for Shopping)
You can buy a travel backpack any time of year, but the best deals come in late August (clearing out summer stock) and February (post-holiday clearance). I bought my favorite Osprey Farpoint 55 for 40% off in August because the color was being discontinued. If you’re buying online, avoid peak travel months (June–August) when prices spike. Local outdoor stores often have sales during Black Friday and Memorial Day, but inventory is limited. For hands-on testing, go mid-week in the off-season—you’ll get better help from staff who aren’t swamped.
Weather-wise, test your pack with the clothes you’ll actually wear. I once bought a pack in a cold store wearing a puffy jacket, only to discover it fit terribly when I wore a t-shirt in the tropics. Bring your estimated heaviest layer to the fitting.
Budget Breakdown
Here’s what you should expect to spend on a quality travel backpack that lasts:
- Low budget ($40–$80): Basic models from Decathlon (Forclaz series) or Teton Sports. They’re functional but lack features like adjustable torso length, load lifters, or waterproofing. I used a Decathlon pack for two years—it survived but was uncomfortable above 12kg. Expect to replace within 2–3 years.
- Mid-range ($100–$220): The sweet spot. Brands like Osprey (Farpoint, Atmos), Gregory (Zulu), Deuter (Futura), and REI Trail 40. These packs offer adjustable suspension, decent materials (210D–330D nylon), and good warranty. My Osprey Farpoint 55 cost $185 on sale and has lasted 5,000 miles across three continents. Worth every penny.
- High-end ($250–$500): Premium brands like Arc’teryx, Mystery Ranch, and ultralight specialists like Zpacks. These use Dyneema or ultra-high-molecular-weight polyethylene, are lighter (2–3 lbs instead of 4–5 lbs), but have fewer features and minimal comfort suspension. Only worth it if you’re a long-distance hiker or have back issues and need absolute minimal weight.
Money-saving tip: Buy used on GearTrade or REI Used Gear. I’ve seen like-new Ospreys for $100. Also, check brand warranty—Osprey’s “All Mighty Guarantee” means they repair any damage for life, even if bought used.
Getting There & Getting Around (Testing and Fitting)
The best place to find your perfect pack is a local outdoor store with a dedicated fitting station (REI, MEC, or a specialty camping store). Go in with your torso measurement: have a friend measure from the bony bump at the base of your neck (C7 vertebra) down to the top of your hip bones (iliac crest). This number—usually 16–22 inches—determines your pack size. Most brands offer small (16–18"), medium (18–20"), large (20–22").
Once at the store, load the pack with 15–20 pounds of sandbags or clothes they provide. Walk around for 10 minutes. Adjust the hip belt so it sits on your hip bones, not your waist. Tighten the shoulder straps so they’re snug but not digging in. Load lifters (the straps at the top of the shoulder straps) should angle at 45 degrees. If the pack sags away from your back or rubs your shoulders, it’s the wrong size. Don’t buy online without at least trying a similar model in person. I made that mistake with a Deuter—bought it online, hated the fit, returned it.
Top Recommendations / Must-Consider Features
Based on real-world testing here are specific packs that stand out for different trip types:
For all-round travel (hostels, city hopping, light hiking): Osprey Farpoint 40 (men’s) or Fairview 40 (women’s). I’ve used the Farpoint 40 for three years. It opens like a suitcase (clamshell), fits in most overhead bins, and has a built-in daypack. Cons: The daypack is a bit flimsy for heavy loads. But the main pack is bombproof. Price: $190.
For long-term budget travel (3+ months, varied climates): Gregory Zulu 45. It has an excellent suspension system with a breathable back panel. I used it in Southeast Asia for six months—never had back sweat issues. The water bottle pockets stretch to fit a 1.5L bottle. Cons: No integrated daypack, and the hip belt pockets are small. Price: $180.
For hiking and camping trips: Osprey Atmos AG 50. The anti-gravity suspension system is unbelievably comfortable. I did a week in Patagonia with 35 lbs and felt zero shoulder strain. The mesh back keeps airflow but reduces load stability for scrambling. Price: $270.
For minimalist ultralight travel: Deuter Speed Lite 35. At 2 lbs 1 oz, it’s incredibly light but still has a frame and hip belt. I used it for a three-week trip in Japan—fits under seat on many planes. Cons: No top lid, limited organization. Price: $140.
Best budget pick: Decathlon Forclaz 50L. For $70, it’s surprisingly durable with a decent suspension. I used it for two years—the zippers are a weak point, but for the price, nothing beats it. Ideal for first-time travelers.
Traveler’s Pro Tips
Tip 1: “Always test with your heaviest expected load.”Most people test an empty pack in a store. That tells you nothing. Ask the store to load it with 20 lbs of sandbags. Walk around for 10 minutes. If it hurts in the store, it’ll be agony on day 3. I did this with my Osprey and caught a pressure point early—saved me a shoulder injury.
Tip 2: “The hip belt should do 80% of the work.”Newbies think shoulder straps carry the load. Wrong. Tighten the hip belt first—it transfers weight to your pelvis. Shoulder straps should only stabilize the pack side-to-side. I see tons of travelers with hip belts dangling loose, then wondering why their back hurts.
Tip 3: “Carry a flat lay photo of your gear before you buy.”Lay everything you plan to bring on the floor, take a photo, and bring it to the store. That photo helps you visualize if the pack’s volume matches your gear. I once bought a 55L pack that felt too big, but seeing my gear photo, I realized I needed every liter. Don’t guess—visualize.
Tip 4: “Check the zipper quality with a stress test.”Zippers fail more than anything else. In the store, open and close all zippers 10 times. Listen for roughness. Tug the zipper sideways—if it separates, walk away. I had a cheap pack whose zipper split open in a train station in India, spilling my clothes. Never again.
Tip 5: “Waterproofing is overrated—get a pack liner instead.”Don’t pay extra for “waterproof” fabric. Most waterproof packs use a coating that wears off in a year. Instead, buy a 3-ounce dry bag (Sea to Summit or similar) that fits inside your pack. It costs $20, keeps everything dry, and works with any pack. I’ve used one for 8 years. Total cost: $20.
Common Mistakes to Avoid
Mistake 1: Buying a bag that’s too big.I did this on my first trip—got a 70L behemoth because “I might need extra space.” I ended up packing a ton of stuff I never used. A bigger bag encourages overpacking, which means more weight, more discomfort, and more fees (many airlines limit checked baggage to 50L). Solution: Stick to 40–50L for trips under a month. You’ll learn to pack lighter.
Mistake 2: Ignoring the weight of the bag itself.Some packs weigh 5+ lbs empty. That’s like carrying a laptop you don’t use. I once bought a tactical-style pack that weighed 6 lbs—by day 2, I was miserable. A high-quality pack should weigh 3–4 lbs. Check the specs before buying. Every pound of pack weight is a pound you can’t use for essentials.
Mistake 3: Forgetting about organization features.A single main compartment with no pockets sounds simple, but you’ll spend 20 minutes digging for your toothbrush every morning. I tried a minimalist pack for a month in Europe—by the end, I was dumping everything out to find my socks. Look for side pockets, a top lid pocket, and at least one internal mesh pocket. A hydration sleeve is a huge bonus for long days.
Mistake 4: Not trying the pack with your body type.Women’s packs are built with shorter torso lengths and narrower shoulder straps. Men’s packs have wider straps and longer torsos. I’ve seen women using men’s packs because they liked the colors—they ended up with hip belt rubbing wrong on their hips. If you’re female, buy a women’s-specific model (like Osprey Fairview). If you’re male, stick to men’s. It makes a real difference in comfort.
Your Travel Checklist
Documents & Prep:
- Measure your torso length (C7 to iliac crest). Write it down.
- Check airline carry-on size limits for your main pack (typically 22 x 14 x 9 inches).
- Read warranty policy—Osprey, Gregory, and Deuter offer lifetime repairs.
Packing:
- Test pack with 15–20 lbs load before buying.
- Buy a pack liner or 20L dry bag for waterproofing.
- Gather your gear list (clothing, tech, toiletries) to match pack volume.
Research:
- Read reviews on OutdoorGearLab or YouTube for your shortlist.
- Check local outdoor store availability for hands-on try.
- Search for used packs on REI Used Gear or GearTrade.
Health & Safety:
- Bring a small first-aid kit (pack weight adds strain—keep minimal).
- If you have back issues, consult a physio about load limits.
- Learn the correct way to lift a pack (squat, don’t bend).
Apps & Tools:
- Use “Measure” app (iPhone) to measure your back.
- Google “pack fitting guide” on YouTube before going to store.
- Save a list of pack weights in a notes app to compare.
Traveler FAQ
Q: How many liters should a travel backpack be for a two-week trip?A: For two weeks, aim for 40–50 liters. That’s enough for 4–5 outfits, toiletries, a laptop, and a small jacket. I’ve done two weeks in a 40L without even packing cubes. If you’re doing mixed climates (jungle and mountains), go 50L. Anything bigger and you’ll overpack.
Q: Should I get a backpack with a built-in daypack?A: It’s a trade-off. A detachable daypack (like Osprey Farpoint/Fairview) is convenient for day hikes or market visits, but the daypack is usually small (15–18L) and less comfortable. I prefer a separate packable daypack (like the Matador Freerain24) that compresses to a palm-sized pouch—more versatile, lighter, and you don’t lose main pack space.
Q: Is there a difference between a hiking backpack and a travel backpack?A: Yes, major difference. Hiking packs are designed for stability and weight distribution on uneven terrain—they have a frame, load lifters, and often a hydration sleeve. Travel backpacks prioritize organization, airport friendliness, and often open like a suitcase. If you’re going to be hiking most of the trip, get a hiking pack. If you’re city hopping, get a travel pack. I’ve used my Osprey Farpoint for both—it works, but I miss the hiking pack’s hip belt for long trail days.
Q: How do I know if my backpack fits correctly?A: The hip belt should sit right on your hip bones, not above them. When you tighten it, 80% of the weight should transfer to your hips. Shoulder straps should wrap around your shoulders without gaping. Load lifters (top straps) should be angled at 45 degrees. Walk around with weight for 10 minutes—if any pressure points, it’s wrong. I do the “shrug test”: lift both shoulders up and down with the pack on—the pack should stay put, not lift with you.
Q: Can I use a duffel bag with shoulder straps instead?A: For short trips (3–5 days) where you’re not walking far, a duffel with straps (like Patagonia Black Hole) works fine. For longer travel or if you’ll be walking with it daily, you need a proper suspension system. Duffel straps often have no load lifters or hip belt—your shoulders will ache within hours. I once used a duffel for a week in NYC—by day 3, I was switching to a backpack I borrowed from a friend.
Ready for Your Adventure?
Choosing the right travel backpack isn’t about finding a magic brand or the lightest weight—it’s about finding a partner that moves with you, carries your world, and frees your hands for better things. I’ve learned this across hundreds of nights in foreign beds: the pack that fits your back becomes invisible. You forget it’s there. You walk faster, explore longer, and never dread packing up. The wrong pack is a chain. The right one is wings.
If you’re hesitating because of the price or the choices, start small. Go to a store. Try one pack with weight. See how it feels. You can always return it. But once you feel a pack that fits right—where the weight vanishes and you can walk all day—you’ll understand why this matters. Your trip deserves that feeling. Your back deserves it. And your next adventure is waiting, but first, choose the pack that will carry you through it.


No comments:
Post a Comment