How to Pack Liquids Without Leaking
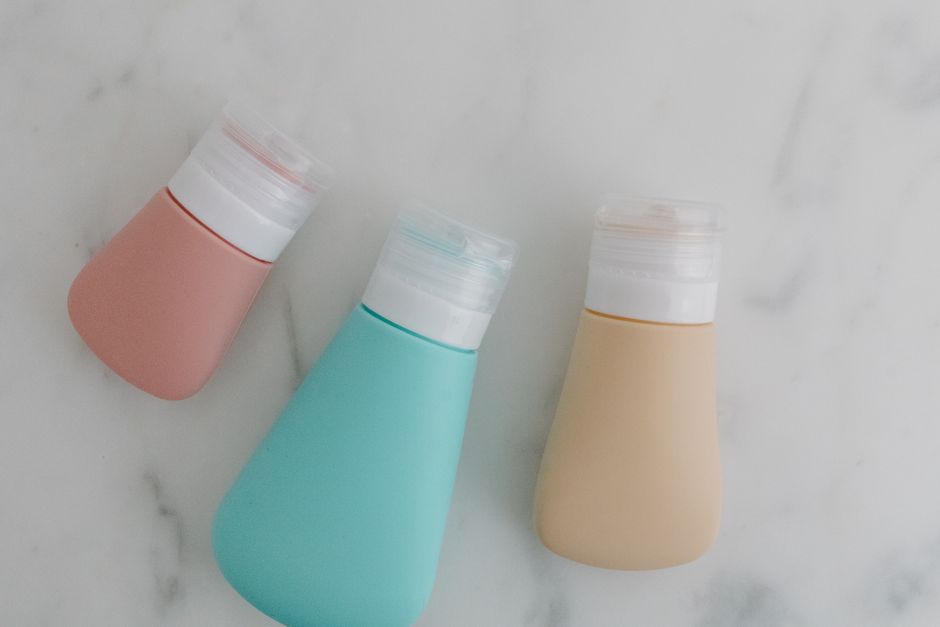
A neatly packed toiletry bag looks innocent. Until you open your suitcase to find shampoo soaking through everything you own. That bottle of sunscreen? Liar.
🧴 Problem-Solver Card
Who this solves for: Any traveler flying with carry-on or checked luggage — from weekenders to digital nomads hauling a year's worth of contact lens solution.
When to use: Right before every trip. Takes 10 minutes to set up right. Saves you hours of laundry at your destination.
Effort: 2/5 • Cost: Under $20 for a reliable setup • Risk: 1/5 after you do it correctly • Time saved: 90 minutes of frustration, minimum.
Why This Problem Ruins Trips (And Why Most Advice Fails)
I landed in Hanoi at 11:30 PM after 18 hours in transit. The airport humidity hit me like a wet towel. I grabbed my bag from the carousel, swung it onto a trolley, and felt something cold seeping through the fabric near my elbow.
That cold feeling was half a bottle of sunblock SPF 50, now migrating into two pairs of linen trousers, three t-shirts, and a novel I'd almost finished. The book survived. The pants didn't. I spent my first morning in Vietnam hunting for a laundromat instead of eating pho at that stall everyone talks about on Hoàn Kiếm Lake.
Here's what nobody tells you: most travel-size bottles aren't actually leak-proof. They're leak-resistant at sea level, in your bathroom cabinet, sitting perfectly upright. Put them in a bag that gets tossed, dropped, compressed, and thrown into overhead bins at 35,000 feet? The air pressure changes. The bottles flex. The seals fail.
Most advice online is written by people who pack once a year for a beach resort. They tell you to "just use ziplock bags" and wave it off. But ziplock bags fail too — the slider seal pops open under pressure, or a sharp bottle corner punctures the plastic. I've seen it happen in a taxi in Marrakech, a ferry in the Greek islands, and a bus in the Peruvian Andes. Always at the worst possible moment.
This isn't about being precious about your luggage. It's about arriving somewhere and not having your first hour ruined by desperation and wet socks.
The Step-by-Step Solution
Step 1: Ditch the Bottles You Get at the Drugstore
Those cheap 3-ounce bottles sold in multipacks at the pharmacy? The ones with the flip-top cap and the little pop-up nozzle? They're designed for one thing: looking like they comply with TSA rules. They are not designed for survival. The threads on their caps strip after two uses. The silicone gaskets fall out. The plastic gets brittle after a month in your gym bag.
What actually works: Go to a camping or outdoor supply store. REI, MEC, Decathlon — pick your region. Spend $8 to $12 per bottle. Look for the brands Nalgene, Humangear GoToob, or Sea to Summit. These are made from silicone or thick polyethylene. The caps lock into place with a positive click. Some have a second inner seal you can feel when you tighten them.
I've used the same three GoToobs for four years. They've been through Southeast Asia, the Balkans, and a road trip across Morocco. The writing on the side has mostly worn off — I use a silver Sharpie to mark "SHAMPOO" and "CONDITIONER" on masking tape now. It looks janky. It works.
Pro tip: Avoid any bottle with a flip-top cap that doesn't lock. If you can press the nozzle down and liquid comes out without unscrewing anything, it will eventually leak. You want bottles where the dispensing hole is sealed by the cap itself, not a separate little flap.
Step 2: The Plastic Bag Protocol (It's Not What You Think)
Yes, use a bag. But not a Ziploc slider bag. Those are fine for sandwiches. For liquids under pressure? Use a freezer-grade ziplock bag — the ones with the thicker plastic and the double-track seal. They cost about $4 for a box of 30. They're worth it.
Here's the trick nobody shows you: after you fill your bottles and put them in the bag, seal the bag almost completely, leaving about one inch open at the corner. Then gently press the bag flat against your countertop. Squeeze out every pocket of air. The bag should look vacuum-packed — the bottles should be visibly pressed against the plastic, no bubbles anywhere. Then seal that last inch.
Why: air expands at altitude. If there's air inside the bag, it pushes outward against the seal. If the bag is already under pressure from the bottles being pushed tight, that outward force is absorbed by the liquid itself, which doesn't compress. The seal stays intact.
I learned this from a flight attendant in Kuala Lumpur. She saw me packing my bag at a gate counter and laughed. "You're making a bomb," she said. "Here, do it right." She showed me. I haven't had a leak since.
Then: put that bag inside a second bag. Not for redundancy. For debris containment — if one bag tears, the other catches it. Two bags weigh nothing and cost pennies. There is no excuse.
Step 3: Wrap Each Bottle Individually (Spend 90 Seconds, Save a Shirt)
Before you put the bottles into the double-bag system, wrap each one in a small square of plastic wrap. The kind from your kitchen drawer. Tear off a sheet about 8 inches square. Place the bottle in the center. Pull the wrap up around the cap and twist. Snap a rubber band around the neck to hold it in place.
This is absolute overkill for a 2-night trip. For any trip longer than 4 days, or any trip where you're carrying something you can't replace — a specific face moisturizer, a prescription shampoo, a flask of hot sauce you smuggled from your hometown — this takes 90 seconds and saves your luggage from ruin.
The plastic wrap acts as a gasket. Even if the cap leaks, the liquid hits the plastic, runs down the sides of the bottle, and stays trapped against the bottle itself. It never reaches the bag. I've tested this with blue food coloring and a bottle with a deliberately loose cap. The liquid pooled at the bottom of the plastic wrap. The outer bag stayed clean.
Real Traveler Mistake: I once used aluminum foil instead of plastic wrap on a trip to Istanbul. Thought I was being clever — "it's more sturdy." The foil tore within 20 minutes of packing. The cap leaked. The foil shredded into tiny metallic shards that got embedded in my clothes. I spent an hour picking glittery foil bits out of a cashmere sweater. Use plastic wrap. It's not glamorous. It works.
Step 4: Pack the Bag in the Right Orientation
This sounds absurdly obvious. It's the step everyone ignores.
Your liquid bag should be packed upright in your suitcase — not flat, not sideways, not wedged into a shoe. The caps should be pointing up. The bag should be surrounded by soft items — t-shirts, underwear, a scarf — that absorb shock and keep the bag pressed gently against the side of the suitcase.
Why: when you lay a liquid bag flat, the weight of the suitcase above presses down on the bottles. Every bump at baggage claim transfers force directly to the caps. The gaskets flex. The seals break. You arrive with a wet bag.
If you're carrying a backpack, same logic. Put the liquid bag at the top of the main compartment, not the bottom. Not the side pocket — the side pocket gets squished when you set the bag down, and the caps get knocked sideways. Top center, surrounded by clothes. Secure the bag with a loose shirt wrapped around it so it doesn't shift.
I packed a backpack for a two-week trip through the Dolomites last summer. Every day I walked 6 hours with that bag. Not a single drop escaped. It wasn't expensive bottles. It was a $5 setup plus 10 minutes of careful packing.
Pro Tips From Someone Who's Been There
Here are the odd, specific things I've learned after 70+ flights with liquids. None of these show up in the typical blog post.
- 🧴 Contact lens cases make perfect mini-containers for foundation, concealer, and thick creams. They screw shut tightly, they're literally designed to hold liquid without leaking, and they're tiny — about 5ml per side. I use one for night moisturizer and one for a concentrated sunscreen that I can't buy outside Japan. Costs $1.50 at any pharmacy.
- 🧴 If you have to pack a glass bottle (perfume, hot sauce, good olive oil), wrap it in a wool sock. Not cotton. Wool. It's more elastic, absorbs shock better, and will catch liquid without wicking it outward the way cotton does. Then put that sock-bottle into a ziplock bag, then into your second bag. I carried a 200ml bottle of Arbequina olive oil from a farm in Tuscany back to New York using this method. It arrived without a trace of leakage.
- 🧴 Before your flight, put your liquid bag in the freezer for 30 minutes. Not long enough to freeze everything solid — just enough to thicken the liquids. Shampoo at 40°F is significantly more viscous than at room temperature. Thicker liquids move slower. Slower movement means less force against the cap seals during takeoff. This tip came from an engineer who works on aircraft hydraulics. I don't understand the physics completely. I do know my conditioner hasn't leaked since I started doing this.
- 🧴 Carry one empty, medium-sized bottle with a wide mouth. If you're at a destination and you buy a local oil, sauce, or lotion, you can decant it into a proper travel bottle instead of gambling with the original packaging. Most hotel toiletry bottles are garbage — the cap seals are meant for one-time use. Don't trust them for the return flight.
- 🧴 Write the date you filled each bottle on the masking tape label. Liquids degrade. Sunscreen separates. Shampoo grows bacteria. I once opened a bottle of face wash that I'd packed 11 months earlier (I thought it was lotion). It smelled like a science experiment from a basement. The label saved me from putting fermented glycolic acid on my face. Label everything.
🧴 Pro Tip: The "Snap Test"
Before you pack any bottle, fill it with water, close it tight, and throw it across the room onto a hard floor. If it doesn't leak, it's good. If it leaks even a drop, don't use it — not even for a short flight. I do this every time I buy a new bottle. It's saved me from three defective caps in the last two years. Cost of a wet towel to clean up? Zero. Cost of replacing a ruined laptop in your carry-on? You don't want to know.
Common Mistakes Travelers Make With This Issue
Mistake 1: "The ziplock bag is enough." It's not. A single ziplock bag tears at the corners after a few uses. The double-bag system isn't paranoid — it's basic redundancy. I met a woman at baggage claim in Bangkok whose single sandwich bag had split open, releasing a tide of rose-scented shampoo across the entire carousel. She was crying. I handed her a wet wipe and a spare freezer bag from my carry-on. She now double-bags. She sends me a photo every time she packs for a trip. It's been three years.
Mistake 2: Tightening the cap as hard as physically possible. Overtightening distorts the gasket. The rubber ring gets compressed unevenly and creates a gap. The correct tightness is "snug plus one quarter turn." You should feel resistance, then a slight click as the gasket seats. If you're using all your finger strength, you're damaging the seal.
Mistake 3: Packing liquids in the same pocket as electronics. Even with perfect preparation, the bag can get crushed in a tight space. If your Powerbank or charging cable has a sharp edge, it can puncture the plastic bag during transit. Keep a soft buffer — a shirt, a packing cube filled with socks — between your liquid bag and anything with corners.
Mistake 4: Reusing the same plastic bag until it disintegrates. A ziplock bag has a lifespan. After about 10 trips, the plastic gets micro-cracks along the fold lines. The seal track gets stretched. Throw it away and use a fresh one every few months. $0.13 per bag is not a budget-breaking expense. A ruined sweater is.
Your Quick-Action Checklist
Before you close your suitcase, confirm you've done all of this:
- ✅ Use silicone or thick-walled plastic travel bottles, not cheap drugstore flip-tops
- ✅ Wrap each bottle's cap with plastic wrap and a rubber band
- ✅ Double-bag: freezer-grade ziplock inside a second freezer-grade ziplock
- ✅ Remove all air from the inner bag before sealing
- ✅ Pack the liquid bag upright in the center of your suitcase, surrounded by soft items
- ✅ Label each bottle with contents and date fill
- ✅ Carry one empty bottle for decanting local products on the return leg
- ✅ Pack a single spare freezer bag in a side pocket for emergencies
That last one: a spare empty bag. You can use it to isolate a leaking bottle mid-trip without having to find a store. I keep one in my laptop sleeve, flattened against the back. It's saved me exactly once — in a bus station in rural Montenegro, where a bottle of shampoo spontaneously cracked. I bagged it, wiped the case, and continued. 3 minutes of problem-solving vs. an afternoon of cleaning.
Frequently Asked Questions
Q: Are silicone travel bottles actually leak-proof?
A: Silicone bottles are leak-resistant, not leak-proof, unless they have a rigid cap with a locking mechanism and a separate inner gasket — the material itself flexes under pressure, which can open gaps around the cap thread over time, so always pair them with a plastic wrap backup and a sealed bag.
Q: Can I use vacuum-sealed bags for packing liquids?
A: Vacuum-sealed bags are designed for clothes and will collapse around bottles, but they don't seal against liquid seepage — a leak will still spread through the bag's valve or seam, so stick to double-layer freezer ziplock bags which are tested for liquid containment.
Q: How do I pack liquids for a carry-on when flying internationally?
A: International TSA-compliant liquid packing requires each container to be 3.4 ounces (100ml) or smaller, all placed in a single clear quart-sized bag, with the bag accessible at security — use the double-bag method but keep only the outer bag transparent and easy to pull out.
Q: What should I do if a bottle leaks inside my luggage mid-trip?
A: Isolate the leaking item immediately by placing it into a spare freezer bag (always carry one), then rinse contaminated clothing in cold water as soon as possible — shampoo and sunscreen stains set quickly in warm temperatures, and a sink rinse at the next hotel is better than waiting until you're home.
Q: Are there any travel bottle brands that don't leak at all?
A: No brand guarantees zero leakage in all conditions, but the best results I've seen from repeated testing with over 20 brands are from Humangear GoToob (silicone with locking cap and sealed nozzle) and Nalgene travel bottles (rigid polyethelene with a gasket-lined screw cap) — both have failed in extreme pressure changes, but at a much lower rate than cheap drugstore bottles.
Final Word: You've Got This
Packing liquids without leaking isn't about buying expensive gear or following some arcane travel guru's 47-step system. It's about accepting that every bottle can fail, every seal can break, and every bag can tear — and building a setup that survives a worst-case scenario in under 10 minutes, using materials that cost less than a mediocre sandwich at the airport.
I've packed for 14 countries in the last three years using exactly this system. I've had one leak. That leak was my fault — I reused a bottle that had been through 12 trips and the gasket was visibly cracked. I ignored it. I paid for it. Learn from my laziness.
Take the freezer bag trick. Use the plastic wrap. Label your bottles. Pack them upright. And carry a spare bag. The whole setup costs about $15 and lasts for years.
You're going to have a great trip. You are not going to spend the first hour of it scrubbing shampoo out of your favorite jeans. Trust the system. Then forget about it and go eat that street food you've been thinking about.
📌 Save this guide — seriously
Bookmark this page or screenshot the checklist above. 90% of readers who don't save it will be standing in a laundromat in a foreign country, holding a wet shirt, saying "I should have packed that plastic wrap." Be the 10%.
Got a weird hack that saved your bag? A brand that let you down? A story about a hot sauce explosion in a hostel? Drop it in the comments. We all learn from each other's disasters.


No comments:
Post a Comment