
In This Article
- Understanding Motorcycle Oil Change Intervals for Touring
- How Riding Conditions on a Tour Affect Oil Life
- Signs Your Motorcycle Needs an Oil Change Mid-Tour
- Planning Oil Changes Around Your Tour Route
- Step-by-Step Guide to Changing Oil on the Road
- Extending Oil Life: Tips and Myths for Touring Riders
- Real-World Oil Change Schedules from Experienced Tourers
- Final Thoughts: Keeping Your Engine Happy for the Long Haul
Understanding Motorcycle Oil Change Intervals for Touring
Planning a long motorcycle tour in 2026 means obsessing over routes, gear, and weather windows. But one of the most common questions riders ask before setting off is about maintenance: how often to change oil on a long motorcycle tour. The answer is rarely as simple as reading the sticker on your fork. Touring puts a unique strain on your engine, and understanding the rhythm of that strain is key to keeping your bike happy for thousands of miles.
Most riders are used to changing oil based on a fixed mileage interval they hit during daily commuting or weekend rides. On a tour, however, you are often covering those same miles in a matter of days, not weeks. This compressed timeline changes the chemistry of your oil. The engine runs hotter for longer, the oil is constantly circulating, and the additives that protect your engine deplete at a faster rate. You are not just riding more; you are riding differently.
When you are crossing state lines or riding coast to coast, a breakdown due to degraded oil is a trip-ender. Towing a fully loaded touring bike from a remote mountain pass is expensive and stressful. Being proactive about oil changes is cheap insurance. The goal is not just to hit a number on the odometer, but to understand the health of the oil currently in your crankcase and predict when it will fail.
There is a big difference between "getting by" and "thriving" on a long tour. Running oil past its useful life might not cause an immediate explosion, but it accelerates wear on your clutch, transmission, and bearings. For a touring bike that you want to last for years, that cumulative damage matters. The 2026 riding season is about maximizing reliability, and that starts with a clean lubrication system.
Finally, remember that your motorcycle’s oil does more than lubricate. In most bikes, the engine oil also cools the engine, cleans internal surfaces, and operates the clutch and gearbox. That is a heavy workload. When you are touring, you are asking that single fluid to do all of those jobs continuously for hours on end. Respecting that workload is the first step to mastering your tour maintenance schedule.
Why Long Tours Demand Different Oil Change Timing
A standard oil change interval assumes a mix of short trips, cold starts, and occasional highway runs. A long tour is the opposite: sustained high speeds, high engine temperatures, and very few cold starts. This is actually good for your oil in some ways, as it burns off moisture and fuel contamination. However, the constant heat also breaks down the oil’s viscosity modifiers and additives faster than normal stop-and-go riding.
Riding all day at 70 mph means your engine is spinning at a steady, high RPM for hours. This generates immense heat. Heat is the number one enemy of motor oil. The longer the oil is exposed to high heat, the faster it oxidizes and thickens. That thickened oil loses its ability to flow quickly to critical parts during startup and high-load situations. So while you might think highway miles are "easy" miles, they are actually "hot" miles that stress the oil chemically.
Another factor is the lack of downtime. On a normal riding schedule, your bike sits overnight and the oil drains back to the sump, allowing contaminants to settle. On a tour, you might ride 10 hours, sleep for 6, and repeat. The oil spends almost its entire life at operating temperature. This continuous thermal cycling, even without extreme heat, shortens the effective life of the oil compared to a bike that gets a few days of rest between rides.
Therefore, if your manual says to change the oil every 5,000 miles for normal riding, you should not blindly follow that on a cross-country tour. Many experienced tourers will change their oil at 3,000 to 4,000 miles when touring hard. The cost of a few quarts of oil and a filter is negligible compared to the peace of mind and engine protection it provides.
Breakdown of Manufacturer Recommendations for Touring Bikes
Most modern touring motorcycles from brands like Honda, BMW, Harley-Davidson, and Yamaha list oil change intervals between 4,000 and 7,500 miles in their owner’s manuals. These numbers are based on laboratory testing and average use. However, the fine print often includes a note about "severe service." Severe service includes dusty environments, high speeds, heavy loads, and high ambient temperatures—all of which describe a typical long tour.
When the manual specifies a severe service interval, it is often half the normal interval. For example, a bike with a 6,000-mile normal interval might have a 3,000-mile severe service interval. If you are riding two-up with luggage through the desert in July, you are in severe service territory. Following the shorter interval is not a waste of money; it is the manufacturer’s own guidance for exactly the conditions you are experiencing.
It is also important to check whether your bike uses a shared sump or separate transmission fluid. Harley-Davidson Big Twins, for instance, have separate engine, primary, and transmission fluids. The engine oil interval might be 5,000 miles, but the primary and transmission might be 10,000 or 20,000 miles. On a long tour, you need to track these separately. A mid-tour engine oil change does not necessarily mean you need to change the gearbox oil too.
Finally, always carry a copy of your owner’s manual or a digital note with the exact oil weight and capacity for your bike. If you end up doing an oil change in a parking lot or a borrowed garage, you will need that information. Writing down the torque spec for the drain plug is also a smart move. Relying on memory after a long day in the saddle is risky.
The Role of Oil Type: Conventional, Semi-Synthetic, Full Synthetic
The type of oil you run has a massive impact on how often to change oil on a long motorcycle tour. Conventional mineral oil is the cheapest but breaks down the fastest. It is generally not recommended for sustained high-temperature touring because its viscosity stability is lower. If you use conventional oil, you should stick to the shortest change intervals, especially in hot weather.
Semi-synthetic blends offer a middle ground. They provide better high-temperature stability than conventional oil and are often priced reasonably. For many touring riders on a budget, a good semi-synthetic changed at the severe service interval is a reliable strategy. It gives you a safety margin without the premium price of full synthetic.
Full synthetic oil is the gold standard for long tours. It resists thermal breakdown, flows better at cold startups, and maintains its viscosity under extreme heat. Many modern touring bikes come from the factory with full synthetic. If you are planning a multi-thousand-mile trip in 2026, switching to a high-quality full synthetic is one of the best upgrades you can make. It often allows you to safely reach the upper end of the manufacturer’s interval, even under touring loads.
However, do not assume synthetic oil means you never have to change it. Synthetic oil still gets dirty. It still accumulates soot, metal particles, and clutch debris. The additives still deplete. What synthetic gives you is a longer effective life and better protection under stress, but it does not eliminate the need for regular changes. Treat it as a buffer, not a free pass.
How Riding Conditions on a Tour Affect Oil Life
The route you choose and the way you ride it will dramatically alter your oil’s lifespan. A leisurely ride along the Pacific Coast Highway is not the same as blasting across Texas in August. Understanding how specific conditions stress your oil helps you plan oil change stops before you leave home. It also helps you make real-time decisions on the road about whether to push another 500 miles or stop for a service.
Oil life is not measured only in miles. It is measured in heat cycles, load, and contamination. Two riders on identical bikes can have very different oil conditions after 3,000 miles depending on how they ride. One might have oil that is still translucent and amber, while the other’s oil is black and thin. Learning to read these conditions is part of becoming a confident long-distance tourer.
Your bike’s oil temperature gauge, if you have one, is a useful tool. Sustained oil temperatures above 230°F (110°C) accelerate oxidation. If you see your oil temp climbing on long climbs or hot days, consider that a sign to shorten your interval. Air-cooled engines, like those on many cruisers, are especially sensitive to ambient temperature and airflow. Sitting in traffic on a hot day can cook your oil even if you are not moving.
Dust and dirt are also major factors. Your air filter catches most of it, but no filter is perfect. Fine particulates can enter the crankcase and act as an abrasive. This is why off-road sections or riding through construction zones can shorten oil life. If your route includes gravel roads or desert crossings, plan for more frequent oil and filter changes.
Highway Cruising vs. Stop-and-Go Traffic
Highway cruising is often considered the easiest condition for a motorcycle engine. The RPMs are steady, airflow is good, and the engine operates in its efficiency sweet spot. For oil, this is mostly true, but with a caveat: the sustained high speed means sustained heat. The oil never gets a break. Over a 500-mile day, that constant heat slowly degrades the oil’s additives.
Stop-and-go traffic presents a different problem. The engine gets hot while airflow is low, especially on air-cooled bikes. The oil temperature spikes. Additionally, repeated clutch engagement in traffic contaminates the oil with clutch friction material. This is a real issue for bikes with wet clutches, which is most motorcycles. The oil darkens quickly and the friction modifiers in the oil can become depleted.
For touring, a mix of both is typical. You might spend hours on the open road, then hit a city at rush hour. The worst scenario is a long highway run followed by a traffic jam on a hot day. The oil is already heat-soaked from the highway, then it gets baked further with no airflow. If you find yourself in this situation often, err on the side of shorter oil change intervals.
Extreme Temperatures, Altitude, and Dusty Environments
Riding through Death Valley or the Arizona desert in summer pushes oil to its limits. Ambient temperatures over 100°F (38°C) mean your engine’s cooling system is already working hard. The oil is the primary coolant for many internal parts, so it runs much hotter than on a mild day. High heat accelerates oxidation, which turns oil thick and sludgy. This is a recipe for bearing damage if left unchecked.
Altitude also plays a role. At high elevations, the air is thinner, which means less efficient cooling for air-cooled engines. Additionally, climbing mountain passes requires high RPMs and heavy throttle, generating more heat. The combination of thin air, high load, and steep grades is one of the toughest tests for engine oil. If your tour includes the Rockies or the Alps, plan for a mid-tour oil change even if you are under the mileage limit.
Dusty environments are common on tours through the Southwest, parts of South America, or any area with gravel roads. Dust clogs air filters, but fine particles still make their way into the engine. Once in the oil, they act like sandpaper on bearings and cylinder walls. Changing the oil filter is just as important as changing the oil itself in these conditions. A clogged filter can go into bypass mode, sending unfiltered oil through your engine.
Carrying Heavy Luggage and Riding Two-Up
Adding weight to your motorcycle increases the load on the engine. More weight means more throttle to maintain speed, especially on hills. More throttle means more fuel burned, more heat generated, and more stress on the oil. A fully loaded touring bike with panniers, a top case, and a passenger can easily weigh 200 to 300 pounds more than the solo rider’s setup.
This extra load means the engine operates at a higher percentage of its maximum output for long periods. The oil is subjected to higher shear forces, particularly in the transmission and clutch. Shear can break down the long-chain polymers that give multi-grade oil its viscosity range. Over time, a 10W-40 oil can effectively become a 10W-30, losing its high-temperature protection.
Riding two-up also changes your gearing and RPM habits. You might find yourself revving higher to keep up with traffic or to make a pass. Higher RPMs mean more oil flow, but also more heat and more mechanical stress. If you are on a fully loaded tour, treat your oil like you would on a track day: check it often and change it early. The small cost of an extra oil change is nothing compared to the cost of an engine rebuild in a remote town.
Signs Your Motorcycle Needs an Oil Change Mid-Tour
Even with careful planning, conditions on the road can change. You might hit a heat wave, ride through unexpected dust storms, or simply put on more miles than you anticipated. That is why knowing the warning signs of degraded oil is essential. You cannot always rely on a mileage sticker; you need to listen to your bike and look at your oil.
The good news is that your motorcycle will often tell you when the oil is past its prime. The engine might get noisier, the gearbox might feel notchy, or the oil itself might look and smell wrong. Learning these cues takes practice, but once you know them, you will have much more confidence making decisions on the road. You will know when to push on to the next town or when to stop immediately.
One of the simplest habits to develop is checking your oil at every fuel stop. It takes 30 seconds. Pull the dipstick or sight glass, look at the level and color, and wipe it on a clean paper towel. This small ritual can catch a problem before it becomes a breakdown. It also forces you to notice trends: if the oil is getting darker faster than expected, you know your interval needs shortening.
Remember that oil color alone is not a perfect indicator. Some oils darken quickly due to detergents doing their job. However, a sudden change in texture, a gritty feel, or a strong burnt odor are reliable signs of trouble. Combine these observations with how the bike feels and sounds, and you will have a clear picture of your oil’s condition.
Visual and Tactile Checks: Color, Texture, and Smell
Fresh motorcycle oil is typically amber or light brown, similar to honey. As it accumulates contaminants, it darkens. By 3,000 miles, it may look dark brown or black. This is normal, especially in bikes with wet clutches. However, if the oil looks jet black and opaque, and it has only been in the bike for 1,500 miles, that is a sign of heavy contamination or high heat. It may be time to change it early.
Texture is another clue. Rub a drop of oil between your thumb and forefinger. It should feel smooth and slippery. If it feels gritty or sandy, there are solid particles in the oil. This could be clutch material, carbon, or in a worst-case scenario, metal shavings. A gritty texture means the oil’s lubricating ability is compromised. Do not wait; change it as soon as possible.
Smell is the third check. Used oil has a distinct odor, but burnt oil smells acrid and sharp, almost like burnt toast or an overheated clutch. If you catch a whiff of that from the oil filler cap or dipstick, the oil has been exposed to excessive heat. It has likely lost viscosity and its protective additives are gone. This is a clear signal to stop riding hard and find a place to change the oil.
Engine Noise, Shifting Issues, and Performance Drops
Your ears are a powerful diagnostic tool. As oil degrades, it becomes thinner and loses its ability to cushion moving parts. You might notice increased valve train noise, a louder top-end tick, or a general mechanical clatter that was not there before. This is because the oil film between metal surfaces is not as thick or robust as it should be. The parts are literally making more contact.
Shifting issues are another common symptom. In a shared-sump motorcycle, the engine oil lubricates the transmission. As the oil shears down and loses viscosity, gear changes can become notchy, stiff, or difficult. You might find it harder to find neutral, or the gearbox might clunk more than usual when shifting. If your shifts start to feel rough, the oil is often the culprit.
A general drop in performance can also occur. The engine might feel sluggish, run hotter than normal, or vibrate more. This is because degraded oil creates more internal friction. The engine has to work harder just to spin its own parts. If you notice your fuel economy dropping alongside these symptoms, it is a strong indicator that your oil is no longer doing its job efficiently.
Using Oil Analysis Tools on the Road
For the data-driven rider, there are now portable oil analysis tools that can give you real-time information about your oil’s condition. Some devices measure the oil’s dielectric constant, which changes as the oil oxidizes and becomes contaminated. You simply place a few drops of oil on the sensor, and the device gives you a reading of oil quality. These tools are small enough to pack in a saddlebag.
Another option is sending a sample to a lab, but that is less practical mid-tour. Mail-in oil analysis takes days or weeks, which does not help when you are 2,000 miles from home and need to decide today. However, some touring riders will take a sample at the start of a trip and then use that baseline to compare with a portable tester later. This gives a rough idea of degradation rate.
Simple blotter spot tests are a low-tech alternative. Place a drop of used oil on a white coffee filter or blotter paper and let it sit for a few hours. The oil will spread out, and you can see rings. A dark center with a wide, dark outer ring indicates heavy soot and oxidation. A clean, amber outer ring means the oil still has life. This method is not precise, but it is cheap and easy to do at a campsite.
Ultimately, these tools are supplements to, not replacements for, common sense and manufacturer guidelines. Use them to confirm what your eyes, ears, and fingers are already telling you. When in doubt, change the oil. The cost of an early oil change on tour is a few dollars and an hour of your time. The cost of ignoring a degraded oil warning can be a ruined engine and a trip cut short.
Planning Oil Changes Around Your Tour Route
When you are mapping out a cross-country ride or a multi-week adventure, oil changes should be part of your route planning just like fuel stops and overnight stays. The question of how often to change oil on a long motorcycle tour depends heavily on your specific bike, your riding style, and the terrain you plan to cover. A relaxed rider on a modern liquid-cooled machine might stretch intervals further than someone thrashing a high-compression twin through desert heat.
Start by checking your owner's manual for the recommended interval under severe service conditions. Most touring riders fall into that category because long hours at highway speed, heavy loads, and high ambient temperatures all count as severe use. If your manual says 5,000 miles for normal riding, assume 3,000 to 4,000 miles is more realistic when you are fully loaded and running day after day.
Next, overlay those intervals on your planned route. If you are riding from Chicago to Los Angeles and back, that is roughly 4,000 miles round trip. You will likely need one oil change mid-trip. Look at your map and mark the approximate mileage points where maintenance will come due. Then identify towns or cities near those points where you can realistically get the work done.
Weather and terrain also affect your schedule. Mountain passes with sustained climbing put more load on the engine and can accelerate oil breakdown. Dusty gravel sections can load up your air filter, which makes the engine run richer and can contaminate oil faster. If your route includes long stretches of dirt or high-altitude riding, plan to shorten your interval by 10 to 20 percent.
Riding in extreme heat is another factor. Crossing the Southwest in July means oil temperatures will climb, and heat is the enemy of oil life. Synthetic oils resist thermal breakdown better than conventional oils, so if you are touring in hot climates, a high-quality synthetic is worth the extra cost. It may allow you to run closer to the upper end of your interval safely.
Finally, build flexibility into your plan. Do not schedule an oil change for the exact mile your odometer hits a number. Instead, plan a window of 200 to 300 miles where you can stop when it is convenient. That way, if you find a great shop in a town you like, you can get the service done early. If you are feeling good and the weather is perfect, you can push a little further without stress.
DIY Oil Changes at Campsites or Parking Lots
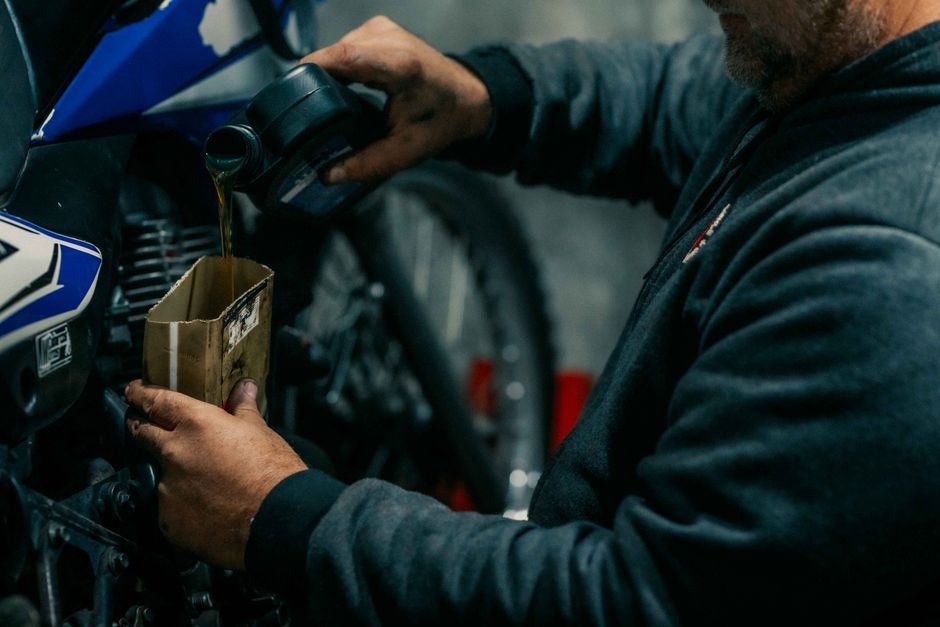
Changing your own oil on the road is entirely doable and saves time compared to hunting for a shop. The key is preparation and choosing the right spot. A campsite with a flat, hard-packed surface works well. Hotel parking lots are another favorite because you usually have access to trash bins and sometimes even water.
Bring a collapsible funnel, a drain pan that seals, and nitrile gloves. Warm the engine for a few minutes before draining so the oil flows easily. Place cardboard or a plastic sheet under the bike to catch drips. Work slowly and keep everything contained.
Many riders prefer to do the job early in the morning before the day heats up. You will have better light and fewer distractions. Always double-check that the drain plug and filter are tight before refilling, then run the engine briefly and check for leaks.
Finding Dealerships and Independent Shops Along the Way
Sometimes you do not want to wrench on your own bike, and that is perfectly fine. Dealerships can handle your make and model, and they usually stock the correct oil and filters. Independent shops are often faster and cheaper, and many mechanics love seeing touring bikes roll through.
Call ahead whenever possible. Ask if they have your oil weight and filter in stock. Some shops will let you bring your own supplies and just charge labor, which can save money. If you are in a remote area, a general powersports shop may be your only option, so be flexible about oil brands as long as the specification matches.
Apps and forums are useful for finding reputable shops. Riders in adventure communities often share recommendations for mechanics who understand touring bikes. A quick search the night before you need service can save you from a bad experience.
Carrying Oil and Filters: How Much Is Enough?
Carrying a full oil change kit adds weight and takes up space, but it gives you total independence. A single quart of oil is enough for top-ups on most bikes, but if you plan to do a complete change, you need the full capacity plus a filter.
Most touring motorcycles hold between 3 and 4 quarts. Pack a filter and enough oil for one full change if you are heading into remote areas where shops are scarce. If your route sticks to populated regions, carrying one quart for top-ups is usually sufficient.
Store oil in a sturdy, leak-proof container. Many riders use the original quart bottles and keep them inside a zip-top bag or a dedicated dry bag. Filters are light and small, so carrying one spare is rarely a burden.
Step-by-Step Guide to Changing Oil on the Road
Changing oil during a long motorcycle tour is not much different from doing it in your garage, but the roadside environment requires extra care. You are dealing with wind, uneven ground, limited tools, and the need to dispose of waste responsibly. A calm, methodical approach makes the job quick and clean.
Before you start, make sure the bike is stable. Use the center stand if you have one. If not, a side stand works as long as the ground is firm and level. You may need to place a small piece of wood or a flattened rock under the stand to prevent it from sinking into soft ground.
Warm the engine for three to five minutes. You want the oil warm enough to drain freely but not so hot that it burns you. Shut the engine off and place your drain pan under the sump. Loosen the drain plug carefully with the correct wrench. Keep steady pressure so the plug does not fall into the pan.
Let the oil drain completely. This can take several minutes, especially if the oil is cold. While it drains, remove the old oil filter. A filter wrench or a strap wrench works best. If the filter is stuck, a screwdriver punched through the side can give you leverage, but this is messy and should be a last resort.
Before installing the new filter, apply a thin film of fresh oil to the rubber gasket. This helps it seal and makes removal easier next time. Thread the filter on by hand until the gasket touches the mounting surface, then tighten it another three-quarters of a turn. Do not over-tighten.
Reinstall the drain plug with a new crush washer if your bike uses one. Tighten it to the torque specified in your manual. Over-tightening can strip the threads in the oil pan, which is a disaster on the road. If you do not have a torque wrench, snug it firmly but do not lean on it.
Refill the engine with the correct amount of oil. Pour slowly and check the level with the sight glass or dipstick. Start the engine and let it idle for 30 seconds. Shut it off, wait a minute, and check the level again. Top up as needed.
Finally, inspect around the drain plug and filter for leaks. Wipe down any spilled oil from the exhaust or engine cases. The first few miles after an oil change, the smell of burning oil from residue is normal, but it should disappear quickly.
Tools and Supplies to Pack for a Tour
Packing a compact oil change kit does not require a full tool roll. The goal is to carry only what you need for this specific job, plus a few general items that help with other roadside fixes.
A small socket set with the sizes for your drain plug and filter cover is essential. A collapsible funnel takes up almost no space and prevents spills. A drain pan that seals is non-negotiable because you cannot transport open oil. Nitrile gloves, rags, and a zip-top bag for the used filter round out the kit.
If your bike has a center stand, you are already set. If not, consider a small sidestand puck to keep the bike stable on soft ground. A headlamp is useful for early morning or evening oil changes.
Safe and Clean Oil Change Procedure Outdoors
Working outdoors means dealing with wind, dust, and uneven ground. Choose a spot away from traffic and preferably out of direct sunlight. A shaded area keeps you cooler and makes it easier to see what you are doing.
Lay down a large piece of cardboard or a plastic tarp before you start. This catches drips and keeps your tools clean. If wind is blowing, position the bike so the wind comes from behind you. That way, any splashes or drips are pushed away from your work area.
Keep your drain pan close to the drain plug before you loosen it. Oil can flow in unexpected directions, especially if the plug is at an angle. Move slowly and keep one hand on the pan. If you drop the drain plug, do not panic. Retrieve it, clean it, and inspect the threads before reinstalling.
When the job is done, wipe everything down. Put the used filter in a zip-top bag. Seal the drain pan. Check the ground for spills and clean them with a rag and a little degreaser if you have it. Leave the area cleaner than you found it.
Proper Disposal of Used Oil While Traveling
Used motor oil is hazardous waste, and dumping it is illegal and harmful. Fortunately, most auto parts stores and many service stations accept used oil for recycling at no charge. The challenge on the road is finding one when you need it.
Carry your used oil in a sealed container until you find a disposal point. Empty oil bottles work well for this. Label them clearly so you do not confuse them with fresh oil. Many riders keep a dedicated used oil jug that seals tightly and fits in a saddlebag or top case.
Plan your disposal stop before you do the oil change. A quick search for auto parts stores near your campsite or hotel will show you where to go. Some campgrounds and marinas also have oil recycling bins. If you are crossing into another state or country, know the local rules, as some areas are stricter than others.
Extending Oil Life: Tips and Myths for Touring Riders
Every touring rider wants to stretch oil change intervals as far as safely possible. Fewer oil changes mean less downtime, less expense, and more time on the road. But understanding what actually extends oil life versus what is just marketing or old-school myth can save you from engine damage.
The single most effective way to extend oil life is to use a high-quality full synthetic oil that meets your motorcycle's specification. Synthetic base stocks resist thermal breakdown and oxidation far better than conventional oils. They also flow better at low temperatures and maintain viscosity at high temperatures. For a long tour, the extra cost is usually justified.
Keeping your engine running at proper temperature also helps. Oil breaks down faster when it gets too hot. Avoid prolonged idling in traffic, and do not lug the engine at low RPM under heavy load. Both conditions raise oil temperature and accelerate degradation. Smooth, steady riding keeps oil temperatures in the ideal range.
Air filter maintenance matters more than most riders realize. A dirty air filter makes the engine run rich, and unburned fuel can wash past the rings and dilute the oil. Checking and cleaning or replacing your air filter mid-tour can keep your oil in better shape and extend its useful life.
There are also myths to ignore. Changing oil more frequently than recommended does not make your engine last longer and just wastes money. Dark oil is not automatically bad oil. Modern oils contain detergents that hold contaminants in suspension, so the oil can look dark while still protecting the engine. Trust the interval, not the color.
Another myth is that all synthetic oils are the same. They are not. Motorcycle-specific oils contain additives designed for wet clutches and shared gearboxes. Using automotive oil in a motorcycle can cause clutch slippage and accelerated wear. Always use an oil that meets the JASO MA or MA2 specification for your bike.
Finally, do not fall for the idea that you can go indefinitely just because you are using synthetic. Even the best oil becomes contaminated with combustion byproducts, moisture, and wear metals over time. The interval exists for a reason. Extending it slightly with good practices is fine, but ignoring it completely is a gamble.
Do Oil Additives Help on Long Trips?
Most oil additives are unnecessary for a well-maintained motorcycle running a quality oil. Modern oils already contain carefully balanced additive packages that include detergents, anti-wear agents, and friction modifiers. Adding more can upset that balance and sometimes cause more harm than good.
Some riders swear by zinc-rich additives for older flat-tappet engines. If your bike has a vintage design, a modest zinc supplement may offer some protection. But for nearly all modern touring motorcycles, the oil you buy off the shelf already has what the engine needs. Save your money for fuel and tires.
The Truth About Oil Coolers and Extended Intervals
An oil cooler can genuinely help extend oil life by keeping temperatures lower, especially in hot climates or during sustained high-speed riding. Heat is the main driver of oil degradation, so anything that reduces oil temperature is beneficial.
However, an oil cooler does not magically double your interval. It reduces thermal stress but does not remove contamination from fuel, moisture, and wear metals. You still need to change the oil at a reasonable mileage. Think of an oil cooler as insurance against extreme heat, not a license to skip maintenance.
Monitoring Oil Consumption vs. Oil Degradation
Oil consumption and oil degradation are two different things, and understanding both helps you manage maintenance on a long tour. Consumption means the engine is burning or leaking oil, so the level drops. Degradation means the oil is losing its ability to lubricate and protect, even if the level stays full.
Check your oil level every morning before you start the engine. Some bikes use a little oil at sustained highway speeds, especially air-cooled twins. Topping up is normal and does not mean the oil needs changing. But if consumption suddenly increases, look for leaks or signs of engine trouble.
Degradation is harder to see. You cannot judge it by color alone. Instead, track your mileage and riding conditions. If you have been riding hard in hot weather, through dust, or with a heavy load, assume the oil is working harder. When you reach the interval you planned before the trip, change the oil even if it looks fine. The cost of fresh oil is small compared to an engine rebuild.
Real-World Oil Change Schedules from Experienced Tourers
The owner's manual gives you a baseline, but the road writes its own rules. Riders who log serious miles often develop a sixth sense for when their engine needs fresh oil. Their schedules account for luggage weight, sustained highway speeds, dusty gravel sections, and the simple reality that a heavily loaded bike works harder than a commuter machine. The consensus among long-distance tourers is that waiting for the factory interval is rarely the smartest move when you are thousands of miles from home.
A common thread among experienced riders is the concept of the "rolling service." Instead of planning a single oil change at the end of a trip, they build stops into the route. This turns maintenance into a natural rest day activity rather than an interruption. Knowing how often to change oil on a long motorcycle tour becomes less about the odometer and more about reading the conditions you are actually riding through.
Several factors push experienced tourers toward shorter intervals. Sustained high RPMs on interstate highways shear oil faster than stop-and-go city riding. Heavy loads increase internal engine temperatures. Frequent cold starts in mountain mornings introduce moisture that needs to be boiled off. Riders who understand these variables tend to err on the side of caution, treating oil as cheap insurance against a ruined trip.
Case Study: 10,000-Mile Cross-Country Tour
A rider crossing the United States from coast to coast on a middleweight adventure bike faced a straightforward question. The manual suggested changes every 7,500 miles under normal conditions, but this trip involved long days at 75 mph with full luggage. The rider chose to change oil every 3,500 miles, roughly twice as often as the manual recommended.
Three oil changes were completed over the course of the journey. The first happened in a motel parking lot using a collapsible drain pan and a recycled plastic jug for the old oil. The second took place at a dealership that allowed use of a service bay for a small fee. The third occurred at a friend's garage near the final destination. Each change took under thirty minutes and cost around sixty dollars for full synthetic oil and a quality filter.
The rider reported that the engine ran noticeably smoother after each change, especially after long stretches of high-speed desert riding. The oil drained from the second change was visibly darker and thinner than expected, confirming the decision to shorten the interval. The peace of mind was worth the extra cost, and the bike completed the trip without a single mechanical issue.
Case Study: Multi-Month Adventure Through Varying Climates
A couple riding two-up on a large touring motorcycle spent four months traveling from the humid southeastern United States through the high deserts of the Southwest and up into the chilly passes of the Rocky Mountains. Their route exposed the engine to extreme temperature swings, high altitude, and long stretches of unpaved road.
They adopted a flexible schedule based on conditions rather than a fixed mileage number. In the humid south, they changed oil at 4,000 miles because the engine ran hot in stop-and-go traffic. In the dry, dusty west, they shortened the interval to 3,000 miles after noticing fine grit accumulating around the air filter. In the cool mountains, they extended back to 4,500 miles because the engine ran at lower temperatures and the oil stayed cleaner longer.
By the end of the trip, they had completed five oil changes in roughly 14,000 miles. They used a high-quality synthetic blend and replaced the filter every time. The bike's engine remained reliable throughout, and the oil analysis they performed after returning home showed no abnormal wear metals. Their experience proved that adapting the interval to the environment is more effective than following a single rigid number.
Lessons Learned from High-Mileage Riders
Riders who regularly cross the 100,000-mile mark on a single motorcycle share remarkably consistent advice about engine oil. Their collective wisdom distills into a few practical rules that apply to nearly any long tour.
- Change the oil before you leave, even if it is not due yet.
- Carry a spare filter and enough oil for one complete change.
- Learn to do a parking lot oil change without making a mess.
- Check the oil level every morning before starting the engine.
- Use the manufacturer's recommended viscosity, not a thicker substitute.
- Keep a small logbook noting mileage, conditions, and oil used.
- Never mix different brands or types of oil in a pinch unless absolutely necessary.
- Dispose of used oil properly at auto parts stores or dealerships.
High-mileage riders also emphasize that how often to change oil on a long motorcycle tour is a question of observation. If the oil looks thin, smells burnt, or the shifting feels notchy, change it early. The cost of an extra oil change is trivial compared to the cost of an engine rebuild in a remote town. Trust your senses and err on the side of fresh oil.
Final Thoughts: Keeping Your Engine Happy for the Long Haul
Every long motorcycle tour is a relationship between you, your machine, and the road. The engine is the heart of that relationship, and oil is its lifeblood. Understanding how often to change oil on a long motorcycle tour means recognizing that no single answer fits every rider, every bike, or every route. The manual provides a starting point, but the real schedule emerges from the conditions you encounter and the way you ride.
Pay attention to your motorcycle. It will tell you when it needs fresh oil through subtle changes in sound, vibration, and shifting feel. Plan your route with maintenance stops in mind, and treat oil changes as a normal part of the journey rather than an annoying chore. A thirty-minute parking lot oil change can save you days of waiting for parts in a town you never planned to visit.
The riders who log the most trouble-free miles are the ones who respect the simple things. They check the oil every morning with their coffee. They carry a spare filter. They know where the nearest auto parts store is at any point along their route. They understand that fresh oil is the cheapest and most effective way to protect the engine that carries them across mountains, deserts, and everything in between.
As you plan your 2026 riding season, build oil changes into your itinerary the same way you plan fuel stops and overnight stays. Your engine will reward you with smooth starts on cold mornings, confident acceleration on mountain passes, and the quiet reliability that makes a long tour truly enjoyable. Ride far, ride safe, and keep the oil fresh.
Gear for this trip
- Motorcycle Full Synthetic Oil
- Motorcycle Oil Filter
- Collapsible Oil Drain Pan
- Motorcycle Oil Change Tool Kit
- Motorcycle Oil Analysis Test Kit
As an Amazon Associate I earn from qualifying purchases.


No comments:
Post a Comment