
In This Article
- Introduction: Why DIY Motorcycle Service Is Essential When There's No Dealership
- Essential Tools and Equipment for Home Motorcycle Service
- Understanding Your Motorcycle's Service Schedule
- Step-by-Step: Performing Basic Maintenance Tasks at Home
- Intermediate DIY Service: Brakes, Fluids, and Electrical
- Advanced DIY Repairs: When You Need to Go Deeper
- Sourcing Parts and Supplies Without a Dealership
- Common Mistakes to Avoid When Servicing Your Motorcycle Yourself
- Final Thoughts: Empowering Yourself as a Motorcycle Owner
Introduction: Why DIY Motorcycle Service Is Essential When There's No Dealership
There is a particular kind of freedom that comes with riding a motorcycle far from the nearest authorized service center. You feel it when the road stretches out ahead of you, empty and open, and the nearest city with a branded dealership is a four-hour ride in the opposite direction. That freedom, however, carries a quiet responsibility. When your chain starts to sag or your oil light flickers on, you cannot simply book an appointment and sip bad coffee in a waiting room. You need to know how to service your motorcycle where there's no dealership, and you need to know it before the need arises.
For riders in rural areas, small towns, or those on extended tours through regions with sparse infrastructure, the dealership model simply does not work. The nearest shop might be closed for the season, might not carry parts for your specific model, or might not exist at all. In these situations, self-reliance is not a hobby. It is the difference between a minor hiccup and a trip-ending breakdown. Learning to handle routine maintenance yourself transforms you from a passive consumer into an active participant in your own journey.
This guide exists for that rider. It is written for the person standing in a gravel driveway with a basic tool roll and a shop manual, wondering whether they can really change their own brake fluid. The answer is yes. You can. And once you start, you will discover that most motorcycle service tasks are not mysterious or overly complex. They are simply procedures that require patience, the right information, and a willingness to get your hands dirty.
We will walk through the tools you need, the service schedule you should follow, and the core jobs that keep your bike safe and reliable. Whether you ride a carbureted single from the 1990s or a modern fuel-injected adventure bike, the fundamentals are the same. You do not need a dealership. You need knowledge, preparation, and a calm methodical approach. By the end of this guide, you will have all three.
The Growing Need for Self-Reliance in Motorcycle Maintenance
Motorcycle dealerships are closing in many regions. Economic pressures, shifting consumer habits, and the rise of online parts sales have made it harder for local shops to survive. Riders in smaller towns increasingly find themselves with no local option for even basic service. The nearest certified technician might be a full day's ride away.
At the same time, motorcycles themselves have become more reliable. Modern engines can go tens of thousands of miles with minimal intervention. This reliability breeds a false sense of security. When something does need attention, the owner may have no experience with even simple procedures. The skill gap widens every year.
YouTube tutorials and online forums have filled some of the void. But videos cannot look at your specific bike, in your specific garage, with your specific set of tools. They cannot tell you that your brake caliper bolts are seized or that your oil drain plug washer is missing. That judgment comes from experience, and experience starts with doing the work yourself. When there is no dealership, you become the service department.
What This Guide Covers and Who It's For
This guide is for the everyday rider who wants to handle routine maintenance at home or on the road. It covers the essential service tasks that every motorcycle needs: oil changes, chain adjustment, brake inspection, air filter cleaning, fluid checks, and basic troubleshooting. It does not cover major engine rebuilds or complex electronic diagnostics.
You do not need to be a professional mechanic. You need to be willing to learn, to follow instructions carefully, and to accept that your first oil change might take two hours. Speed comes later. The goal here is competence and confidence. If you can read a torque specification and use a wrench, you can service your motorcycle. This guide will show you how.
Safety First: Preparing Yourself and Your Workspace
Motorcycle service is safe when approached with respect. Your bike is heavy, its fluids are toxic, and its moving parts can crush fingers. Before you touch a single bolt, prepare your workspace. Work on level ground, preferably concrete or asphalt. Use a proper motorcycle stand or a stable center stand. Never rely on a car jack alone.
Wear eye protection when working with fluids or compressed air. Keep nitrile gloves nearby for oil and brake fluid. Have a fire extinguisher accessible, and never work near open flames or pilot lights when handling gasoline. Ventilate your space if you are running the engine indoors.
Finally, think about your own limits. If a task feels unsafe or beyond your current skill level, stop. There is no shame in seeking help from a knowledgeable friend or a mobile mechanic. The goal is to ride again, not to prove a point. Service your motorcycle carefully, and it will take care of you on the road.
Essential Tools and Equipment for Home Motorcycle Service
You do not need a professional mechanic's toolbox to service your motorcycle at home. What you need is a focused collection of quality tools that cover the most common tasks. Buying cheap tools is a false economy. A poorly made socket can round off a bolt head and turn a simple job into a nightmare. Invest in decent tools, and they will last for decades.
Start with the basics and expand as your skills grow. Many riders begin with a simple socket set and add specialty tools only when a specific job requires them. This approach keeps costs down while ensuring you always have what you need. The key is organization. A cluttered toolbox wastes time and leads to lost parts.
When you service your motorcycle where there's no dealership, your tools are your lifeline. Treat them well. Clean them after use, store them properly, and replace anything that shows signs of wear. A broken tool at the wrong moment can leave you stranded just as surely as a broken part.
Basic Hand Tools Every Motorcycle Owner Should Have
A good metric socket set is the foundation of any motorcycle toolkit. Most motorcycles use metric fasteners, typically ranging from 8mm to 19mm. Look for a set that includes both shallow and deep sockets in 1/4-inch and 3/8-inch drive sizes. A 1/2-inch drive set is useful for larger fasteners like axle nuts.
Combination wrenches are equally important. You will use them for jobs where a socket cannot fit, such as adjusting chain tension or bleeding brakes. A set covering 8mm through 19mm will handle most tasks. Ratcheting wrenches are a nice upgrade but not essential.
Screwdrivers are another must-have. You need both Phillips and flathead drivers in multiple sizes. Many Japanese motorcycles use JIS (Japanese Industrial Standard) Phillips screws, which look similar to standard Phillips but fit differently. A JIS screwdriver set will prevent stripped screw heads.
Pliers and Allen keys round out the basics. Needle-nose pliers help with cotter pins and small springs. A full set of metric Allen keys or hex sockets is essential for modern motorcycles, which use hex fasteners extensively. Add a torque wrench to the list, as correct fastener tension is critical for safety.
Specialty Tools That Make the Job Easier
A motorcycle stand is arguably the most valuable specialty tool you can own. A rear stand lifts the rear wheel for chain maintenance and tire changes. A front stand or head-lift stand handles the front end. Without a stand, many jobs become awkward or impossible. Choose a stand designed for your bike's swingarm type.
A chain breaker and riveting tool is essential if you plan to replace your own chain. This tool presses out old chain pins and rivets the new master link securely. While you can use a clip-style master link, a riveted link is stronger and safer for larger motorcycles.
For brake work, a vacuum bleeder makes fluid changes dramatically easier. It pulls fresh fluid through the system without the need for a second person pumping the lever. A simple one-way check valve bleeder is a cheaper alternative that still works well.
Other useful specialty items include a tire pressure gauge, a multimeter for electrical diagnosis, and an oil filter wrench specific to your bike's filter size. You will not need every specialty tool on day one. Build your collection as your maintenance schedule demands.
Setting Up Your DIY Service Area
Your service area does not need to be a dedicated garage. A flat stretch of driveway or a carport works fine. The key requirements are level ground, good lighting, and protection from weather. Working on gravel or grass is dangerous because stands can sink and tip.
Keep your tools organized on a rolling cart or a simple workbench. A magnetic tray holds small fasteners and prevents lost bolts. Good lighting is non-negotiable. A bright LED work light helps you see into dark recesses and spot leaks or cracks.
Finally, think about cleanup. Keep rags, a drain pan, and a container for used oil nearby. Lay down cardboard to catch drips. A clean, organized workspace makes every job faster and safer. It also makes the work more enjoyable, which means you will actually do it.
Understanding Your Motorcycle's Service Schedule
Every motorcycle has a service schedule. It is printed in the owner's manual, and it tells you exactly what needs attention at specific mileage intervals. Ignoring this schedule is the fastest way to turn a reliable motorcycle into a problem child. The schedule is not a suggestion. It is a roadmap for keeping your bike safe and dependable.
When there is no dealership nearby, you must become the keeper of this schedule. Keep a logbook. Write down every service you perform, the date, and the mileage. This record helps you track what has been done and what is coming due. It also adds value if you ever sell the bike.
The schedule varies by make and model, but the broad strokes are universal. Oil changes, chain adjustments, brake inspections, and air filter cleanings happen frequently. Valve checks and coolant replacements happen less often but are equally important. Learn your bike's schedule and plan ahead.
Decoding the Owner's Manual: What Needs Doing When
Your owner's manual contains a maintenance chart, usually presented as a table. Rows list service items. Columns show mileage or time intervals. A dot or checkmark indicates that a particular item needs attention at that interval. Some items are marked with symbols for "inspect" versus "replace."
Read this chart carefully before you start any work. Note which items require replacement parts and which only need inspection. For example, you might inspect brake pads at every oil change but only replace them when they wear below a minimum thickness. The manual will specify these limits.
Pay special attention to items marked as critical safety systems. Brakes, tires, steering, and suspension directly affect your ability to control the motorcycle. These items get priority. If you cannot perform a required service yourself, find a way to get it done. Safety is never negotiable.
Finally, remember that time-based intervals matter even if you ride few miles. Rubber hoses degrade, brake fluid absorbs moisture, and seals dry out. A motorcycle that sits for months may need service based on calendar time, not just mileage. Your manual will list both.
Common Service Intervals and What They Include
Most motorcycles need an oil and filter change every 3,000 to 5,000 miles, or once a year. This is the single most important service you can perform. Fresh oil lubricates, cools, and cleans the engine. Old oil breaks down and loses its protective properties.
Chain maintenance happens even more frequently. You should clean and lubricate your chain every 500 to 1,000 miles, or after riding in rain. Check chain tension and adjust as needed. A loose chain can jump off the sprocket. An overtightened chain strains the countershaft bearing.
Brake inspections should occur at every oil change. Check pad thickness, rotor condition, and brake fluid level. Replace brake fluid every two years, as it absorbs moisture and loses effectiveness. Brake pads typically last 10,000 to 20,000 miles depending on riding style.
Air filter service intervals vary. Foam filters need cleaning and re-oiling every few thousand miles. Paper filters are replaced when dirty. A clogged air filter reduces performance and fuel economy. Valve clearance checks often fall around 15,000 to 24,000 miles, depending on the engine design.
Coolant replacement is typically due every two to three years. Spark plugs last 8,000 to 16,000 miles on most bikes. Fork oil should be changed every 10,000 to 20,000 miles for optimal suspension performance. By following these intervals, you keep your motorcycle running smoothly for years without ever visiting a dealership.

Step-by-Step: Performing Basic Maintenance Tasks at Home
Learning how to service your motorcycle where there's no dealership starts with mastering the basics. These are the tasks you will perform most often, especially if you are touring long distances or living in a remote area. The key is to build a small, mobile tool kit and establish a clean workspace. Even a hostel parking lot or a campsite can become a functional garage if you are organized. Always lay down a tarp or a piece of cardboard to catch spills and keep track of small parts. A magnetic tray is a lifesaver for keeping bolts from rolling away into the gravel. Before you touch anything, let the engine cool down slightly to avoid burns, but doing an oil change on a warm engine helps the fluid drain more completely.
Oil and Filter Change: The Foundation of Engine Health
Changing your oil is the single most important thing you can do to keep your engine alive when professional help is hundreds of miles away. You do not need a dealership to do this; you just need the right weight of oil, a new filter, a drain pan, and a wrench. Start by positioning the bike on a level surface or using a center stand. Place your pan under the drain bolt, crack the bolt loose with a socket, and let gravity do the work. While the oil drains, remove the old filter. If it is stuck, a screwdriver driven through the canister works as a crude but effective wrench in an emergency.
Before installing the new filter, dip your finger in fresh oil and rub it on the rubber gasket. This prevents the gasket from binding and tearing when you spin it on. Hand-tighten the filter firmly, but do not use a wrench to crank it down or you will never get it off on the side of the road. Replace the drain bolt, ideally with a new crush washer if you have one, and torque it to spec if your tool kit includes a torque wrench. If not, snug it tight but do not lean on it with all your weight. Fill the engine with the exact amount specified in your manual, then run the bike for a minute, check for leaks, and check the sight glass. Always pack out your old oil in a sealed container until you can recycle it properly.
Chain Cleaning, Lubrication, and Adjustment
A neglected chain wears out sprockets fast and can snap, leaving you stranded. When you service your motorcycle where there's no dealership, your chain needs attention every 500 to 800 miles, or after riding in rain or dust. Start by putting the bike on a stand or rolling it forward in increments to access the chain. Spray a dedicated chain cleaner or kerosene onto the links and scrub with a grunge brush until the metal is visible. Wipe it dry with a rag.
Once clean, apply a quality chain lube to the inside run of the chain, aiming for the O-rings. Spin the wheel slowly to distribute the lube evenly. After lubrication, check the slack at the midpoint of the bottom run. It should move up and down roughly an inch or as specified in your owner’s manual. If it is too loose, loosen the rear axle nut and turn the adjuster bolts equally on both sides. Use the alignment marks on the swingarm to keep the wheel straight. A misaligned wheel causes rapid wear and poor handling. Tighten the axle nut back to spec and recheck slack before riding.
Checking and Replacing Air Filters
Your engine needs to breathe, especially in dusty or sandy travel conditions. A clogged air filter robs power and increases fuel consumption. Accessing the filter usually requires removing the seat or side panels, and sometimes the fuel tank on certain dual-sport models. Once you open the airbox, remove the filter element carefully. If it is a foam filter, wash it in solvent or warm soapy water, let it dry completely, and re-oil it with specific foam filter oil. Squeeze out the excess oil—do not wring it.
If you have a paper filter, hold it up to a light source. If you cannot see light through the pleats, it is time to replace it. Never try to wash a paper filter or blow it out with high-pressure air, as this damages the fibers. When reinstalling, ensure the filter seats perfectly flat against the airbox lip. A tiny gap can let abrasive dust straight into your cylinder. This is a simple job that takes ten minutes but can save you from a catastrophic top-end rebuild in a place with no parts availability.
Intermediate DIY Service: Brakes, Fluids, and Electrical
Once you are comfortable with basic maintenance, you can tackle systems that are critical for safety and reliability. Brakes and electrical components often scare riders, but the logic is straightforward. The most important rule when working on these systems is cleanliness. Brake fluid is corrosive to paint, and electrical connections hate moisture. Work methodically, take photos with your phone before disassembling anything, and label wires with masking tape if you are unsure. When you learn to service your motorcycle where there's no dealership, you gain the confidence to diagnose issues before they become breakdowns.
Brake Pad Replacement and Brake Fluid Flush
Brake pads wear down gradually, and checking them regularly prevents damage to your rotors. To replace pads, remove the caliper bolts and slide the caliper off the rotor. Do not squeeze the brake lever while the caliper is off, or you will push the pistons out. Remove the retaining pin and slide the old pads out. Before installing new pads, you must push the pistons back into the caliper to make room for the thicker material. A clean tire lever or a dedicated piston spreader works well. Push slowly and evenly.
Installing new pads is the reverse process. Once the caliper is back on, pump the brake lever until you feel pressure. Now is also the perfect time to flush the fluid. Old brake fluid absorbs water, which lowers its boiling point and causes a spongy lever. Attach a clear tube to the bleeder nipple, place the other end in a jar with a little fluid, and pump the lever while opening and closing the nipple. Keep the reservoir topped up with fresh DOT 4 or the fluid specified for your bike. Continue until the fluid running through the tube is clean and free of bubbles. Never reuse old brake fluid.
Coolant and Other Fluid Checks
If your bike is liquid-cooled, checking the coolant level is a quick visual task. Look at the overflow reservoir while the bike is upright and cold. The level should sit between the low and high marks. If it is low, top it up with the correct type of coolant. Do not mix different colors of coolant, as they can gel and clog your radiator. If you need to add water in an emergency, use distilled water, not tap water, to avoid mineral deposits.
Do not forget your other fluids. Check the brake fluid sight glasses on both master cylinders. The fluid should be light amber, not dark brown. Check your clutch fluid if you have a hydraulic clutch. Inspect the fork seals for any wetness or grime rings on the stanchions, which indicates a leak. Finally, check your final drive oil if you ride a shaft-driven bike. These checks take five minutes during a fuel stop and give you early warning of problems long before they leave you walking.
Battery Care and Basic Electrical Troubleshooting
Electrical problems are the most common reason riders get stranded. Start with the battery. If your bike cranks slowly or not at all, check the voltage with a multimeter. A healthy, fully charged battery reads around 12.6 to 12.8 volts with the bike off. Start the bike and the voltage should rise to 13.5 to 14.5 volts if the charging system is working. If it stays low, your stator or regulator/rectifier may be failing.
Keep the battery terminals clean and tight. A loose ground wire can cause bizarre, intermittent issues that are very hard to diagnose on the road. Apply dielectric grease to connections to prevent corrosion, especially if you ride in humid or coastal areas. Carry a small jump pack or a set of jumper cables. If a fuse blows, replace it with the exact same amperage. A blown fuse is a symptom, not the disease—look for a pinched wire or a short before riding on. Learning how to service your motorcycle where there's no dealership means trusting your multimeter more than your luck.
Advanced DIY Repairs: When You Need to Go Deeper
There are some jobs that most riders would never attempt in a home garage, let alone on the road. However, when the nearest dealership is a border crossing away, you may have no choice. Advanced repairs require patience, the right tools, and a willingness to learn from your mistakes. Always consult a factory service manual—not just the owner’s manual—before digging into an engine or suspension. A digital copy on your phone or tablet takes up no space but contains every torque spec and procedure you will need. Work in a clean, well-lit area and give yourself twice as much time as you think the job will take.
Valve Clearance Adjustment: Is It DIY-able?
Checking and adjusting valve clearances is the most intimidating routine service on a motorcycle. The short answer is yes, it is DIY-able, but it requires precision and patience. You will need a feeler gauge set, basic hand tools, and possibly a shim kit if your bike uses shim-under-bucket valves. Start by removing the seat, tank, and any bodywork blocking access to the valve cover. Remove the valve cover carefully, keeping dirt out of the engine. You will need to rotate the engine to top dead center on the compression stroke for each cylinder.
Slide the correct feeler gauge between the cam lobe and the valve bucket or rocker arm. There should be a slight drag when the clearance is correct. If it is too tight or too loose, you must adjust it. On older bikes with screw-and-locknut adjusters, this is simple—loosen the locknut, turn the screw, and recheck. On shim systems, you must remove the camshafts to swap shims, which is a much bigger job. Record every measurement before disassembly. If you are methodical and double-check your work, you can do this in a campground. If you rush, you risk engine damage. When in doubt, check the clearances and only adjust if absolutely necessary.
Fork Seal and Suspension Service
A leaking fork seal coats your brake rotor in oil and ruins your handling. Replacing a seal requires removing the front wheel, brake calipers, and the fork legs from the triple clamps. You will need a seal driver tool, though a piece of PVC pipe of the correct diameter can work in a pinch. Drain the old fork oil into a container and note how much comes out. Remove the dust seal and retaining clip, then slide the fork tube out of the slider with a sharp pull to pop the old seal out. Install the new seal carefully, using a plastic bag over the fork tube to protect the lip from nicks. Refill with the correct weight and volume of fork oil, then reassemble. This is a messy job, but very doable with basic tools.
Tire Changes and Wheel Balancing at Home
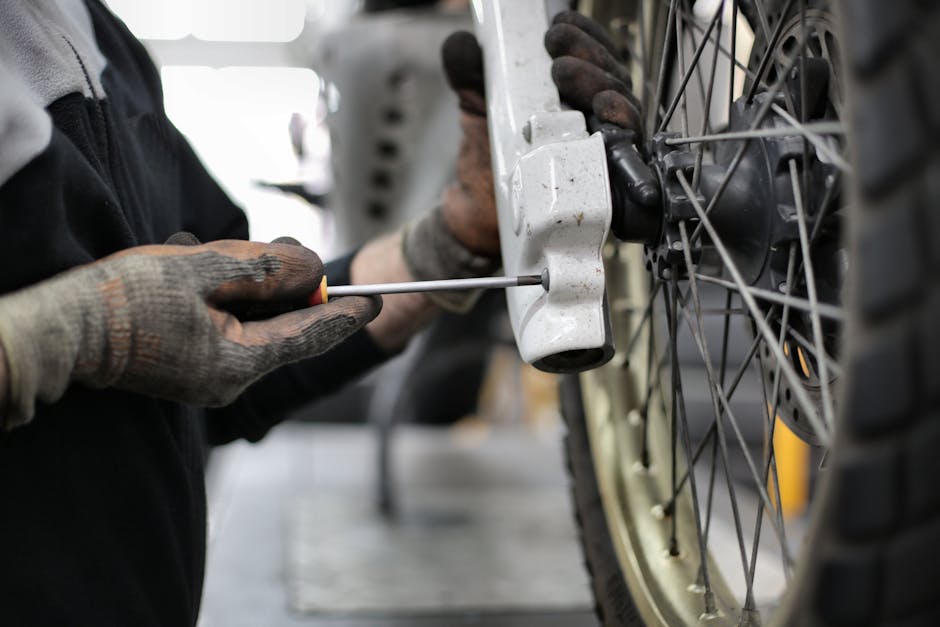
Changing a tire without a machine is a rite of passage for adventure riders. You need three long tire irons, a bead lubricant like soapy water, and a lot of patience. Break the bead on both sides of the old tire by stepping on the sidewall or using a bead breaker tool. Work the tire irons around the rim, taking small bites to avoid pinching the tube if you have one. When installing the new tire, note the rotation arrow. Inflate the tube slightly before fitting to prevent pinching it. Seat the bead with a burst of air, then balance the wheel using a simple axle stand. Add stick-on weights opposite the heavy spot until the wheel stays still in any position. This skill saves you hundreds of dollars and keeps you moving when you are truly on your own.
Sourcing Parts and Supplies Without a Dealership
One of the biggest anxieties for riders living far from a branded service center is finding the physical items needed for a job. The good news is that the world has changed dramatically for the DIY mechanic. You no longer need a dealership parts counter to keep your bike running smoothly. Learning how to service your motorcycle where there is no dealership starts with knowing where to look for quality components, fluids, and tools that won't let you down on the road.
The key is to shift your mindset from "OEM or nothing" to "quality and compatibility." While genuine manufacturer parts are sometimes necessary for complex engine internals, the vast majority of maintenance items like filters, brake pads, chains, and sprockets are available through high-quality aftermarket brands. These parts often meet or exceed original specifications and are designed to be installed by home mechanics.
Before ordering anything, always have your motorcycle’s exact year, make, and model written down. Better yet, take a photo of your VIN sticker. This prevents the frustration of receiving a part that is subtly different for a mid-year model change. Cross-referencing part numbers is your best friend when you are far from professional help.
You should also stock up on "consumables" before you actually need them. If you are planning a long trip or live in a remote area, having a spare oil filter, a set of brake pads, and a quart of oil on your shelf means you are never stranded waiting for a delivery truck. It turns a potential crisis into a simple afternoon task.
Online Retailers and Aftermarket Options
The internet is the great equalizer for riders in remote locations. Large online motorcycle part retailers have massive warehouses and can ship nearly anywhere in the country within a few days. Websites specializing in aftermarket gear offer intuitive search functions where you can input your bike’s details and see only the parts that fit your specific model.
When shopping online, look for brands that have a strong reputation in the riding community. Brands like EBC for brakes, DID for chains, and K&N or HiFlo for filters are trusted by mechanics worldwide. Reading reviews from other riders who own the same bike as you can save you from buying a poorly machined component. Do not be afraid to ask questions on online forums specific to your motorcycle model; the collective knowledge there is often deeper than what you would find at a service desk.
Shipping logistics are crucial. If you are in a truly isolated area, consider consolidating your orders to save on freight costs. Buying a "service kit" that includes oil, a filter, and a crush washer in one box is often cheaper than buying separately. Additionally, many online retailers offer downloadable service manuals or links to video tutorials, which can be a lifesaver when you are turning a wrench alone in your garage.
Local Alternatives: Auto Parts Stores and Salvage Yards
Sometimes you cannot wait for shipping. When you need to learn how to service your motorcycle where there is no dealership immediately, look to the businesses already in your town. Auto parts stores are surprisingly useful for motorcycle owners. While they may not stock motorcycle-specific oil filters, they often carry the correct viscosity of engine oil, brake fluid, coolant, grease, and general shop supplies like rags, torque wrenches, and thread locker.
Salvage yards and motorcycle breakers are goldmines for the DIY traveler. If you need a mirror, a lever, a foot peg, or a fuel tank that is no longer in production, a salvage yard is your only hope outside of a dealership. These places allow you to pull parts yourself, which teaches you exactly how they are mounted before you touch your own bike. It is a hands-on education that no manual can replicate.
Building a relationship with the staff at your local auto parts store is also invaluable. They can often order motorcycle-specific items through their commercial networks even if they do not stock them on the shelf. Ask them about their delivery schedules; many stores receive daily shipments and can have a part for you within 24 hours, turning a local shop into your personal logistics hub.
Common Mistakes to Avoid When Servicing Your Motorcycle Yourself
Servicing your own bike is incredibly rewarding, but it is also where expensive errors are born. When you are working without a dealership safety net, a small mistake can mean days of downtime waiting for a replacement part. By being aware of the most common pitfalls, you can ensure that your DIY service keeps you on the road rather than pushing you into a frustrating corner.
The first and most dangerous mistake is over-tightening fasteners. Motorcycles are made of soft aluminum and magnesium alloys. Unlike working on a car or a tractor, brute force is your enemy. Without a torque wrench, it is incredibly easy to strip the threads in an oil pan or snap a bolt head clean off. Always use a torque wrench and consult the specific torque values in your service manual. "Tight enough" is rarely correct on a motorcycle.
Another frequent error is mixing up fluids or using the wrong specification. Modern motorcycles have wet clutches that share oil with the engine. Pouring in automotive oil with friction modifiers will cause your clutch to slip and fail. Always verify that the oil bottle explicitly states it is safe for wet clutches (often labeled JASO MA or MA2). The same goes for brake fluid; using DOT 3 when the system requires DOT 4 or 5.1 can lead to brake fade and seal damage.
- Skipping the crush washer: Reusing an old crush washer on the oil drain plug often leads to a slow, annoying leak.
- Pinching the inner tube: When changing tires, using excessive leverage on tire irons can puncture the tube, leaving you stranded.
- Disconnecting the battery incorrectly: Always disconnect the negative terminal first to avoid shorting the electrical system against the frame.
- Forgetting to loosen the pinch bolts: When adjusting the chain or removing a wheel, forgetting the axle pinch bolts can damage the fork or swingarm.
- Ignoring the chain slack: Adjusting the chain too tight is worse than leaving it too loose, as it puts immense stress on the countershaft bearing.
Organization is another area where DIY mechanics fail. It is very common to take apart a carburetor or a clutch assembly, get distracted, and forget the exact order of reassembly. Use a muffin tin or a magnetic tray to organize bolts by their step. Take photos with your phone before you remove a cover or disconnect a hose. These photos serve as a visual map when you are putting everything back together hours later.
Finally, do not ignore the "feel" of the bike. If a part is forcing you to fight it, stop. Components on a motorcycle generally slide together with minimal force if aligned correctly. If you are hammering on a bearing or forcing a gasket, you are likely doing something wrong. Step back, consult a forum or a video, and reassess. Patience is the cheapest tool in your kit, and rushing a job is the fastest way to create a bigger problem than the one you started with.
Final Thoughts: Empowering Yourself as a Motorcycle Owner
Learning to maintain your machine far from the bright lights of a dealership showroom is one of the most liberating steps you can take as a rider. It transforms you from a passive consumer into an active participant in your own journey. The confidence that comes from knowing you can diagnose a strange rattle, change your own fluids, or replace a broken lever in a parking lot is immeasurable.
This skillset does more than save you money; it deepens your connection to the machine beneath you. You begin to understand the rhythm of the engine and the tension of the chain. You notice small changes before they become catastrophic failures. That awareness makes you a safer, more intuitive rider. The road becomes less intimidating when you know you are carrying the knowledge to fix what breaks.
So start small. Do not try to rebuild your engine on the first weekend. Change your oil. Adjust your chain. Clean your air filter. With every successful job, your toolbox of skills grows, and your reliance on distant dealerships shrinks. The open road belongs to those who are prepared, and there is no better preparation than knowing exactly how your bike works from the inside out.
Gear for this trip
- Motorcycle Torque Wrench
- Motorcycle Chain Cleaner and Lube Kit
- Motorcycle Oil Filter Wrench
- Motorcycle Rear Stand
- Multimeter for Motorcycle Electrical Diagnosis
As an Amazon Associate I earn from qualifying purchases.


No comments:
Post a Comment