
Emergency Braking: Front vs. Rear Technique
Introduction
Remember the first time you sat on a motorcycle? The mixture of excitement, freedom, and a healthy dose of pure, unadulterated fear. Your heart pounded as you turned the key, the engine rumbling to life beneath you, a living creature waiting for your command. You likely felt a surge of "Can I actually do this?" followed by the thrilling thought, "I'm going to do this." That emotional cocktail is the universal starting point for every rider who has ever graced two wheels. If you're reading this, you're probably in that beautiful, terrifying beginning—or you're considering taking the leap. And your biggest question, the one that whispers in your ear when you imagine a car pulling out in front of you, is simple: "How do I stop this thing when I absolutely have to?"
This article is your answer. We're going to demystify the single most critical skill in motorcycling: effective emergency braking. Specifically, we'll break down the often-confusing interplay between the front and rear brakes. This isn't about dry theory; it's about practical, life-saving skills that will transform you from a nervous novice into a confident, competent rider. We'll address your fears directly, validate that they're normal, and then give you the knowledge and step-by-step process to overcome them. You'll learn not just what to do, but why it works, building the muscle memory and mental framework to react correctly when milliseconds count. The journey from anxiety to assurance begins with understanding. By the end of this guide, you will have a clear, actionable plan to master your brakes, turning panic into controlled, powerful stopping. Let's build that confidence together.
The Reality Check
Before we dive into technique, let's have an honest conversation about what learning to ride truly involves. Many beginners are sold a fantasy of effortless freedom, cruising down open roads without a care. The reality is more nuanced—and ultimately more rewarding. Riding is a skill-based activity, akin to learning a musical instrument or a sport. It demands physical coordination: fine throttle control with your right hand, precise clutch modulation with your left, braking input with both hands and feet, all while balancing a several-hundred-pound machine. Mentally, it requires hyper-awareness, constant risk assessment, and split-second decision-making. Your brain must process a vast stream of visual, auditory, and tactile information simultaneously.
The timeline is also a common point of misconception. You won't master it in a weekend. While basic control can be grasped in a few hours, true proficiency and comfort take months of consistent, deliberate practice. Financially, the bike's purchase price is just the entry fee. Quality protective gear, insurance, maintenance, and fuel are significant, ongoing investments. This might sound daunting, but it's not meant to discourage you. It's meant to prepare you. Asking "Is riding right for me?" is wise. The answer lies in your willingness to embrace the learning curve, respect the machine, and prioritize safety over ego. If you approach it with patience and humility, the rewards—the unparalleled sense of connection, freedom, and accomplishment—are absolutely worth the effort.
Safety First: Non-Negotiable Basics
You cannot practice emergency braking—or any riding—safely without the proper foundation. Your gear is your primary safety system, far more than any electronic aid on the bike. Statistics consistently show that proper gear dramatically reduces the severity of injuries in a crash. This isn't about fashion; it's about creating a protective shell between you and the asphalt. Let's break down the essentials.
Helmet: This is non-negotiable. Look for certification stickers: DOT (minimum), ECE (strong global standard), or SNELL (rigorous performance standard). Fit is paramount. It should be snug without pressure points, with your cheeks slightly compressed. When you move your head, the helmet should move with your skin, not shift independently. A full-face helmet offers the best protection for your jaw and face. Protective Clothing: Your jacket and pants should be made of abrasion-resistant materials like leather or high-denier textile (e.g., Cordura) and include armor at the shoulders, elbows, knees, and back. Gloves protect your hands in a slide and improve grip. Boots should cover your ankles, have oil-resistant soles, and offer protection from impact and crush. Visibility: You are harder to see than a car. Incorporate high-visibility colors (yellow, orange, white) or reflective elements into your gear. Position yourself in the lane to be seen in car mirrors, and always use your headlight.
A realistic budget for quality starter gear is $800 to $1,500. Beginners often cut corners on boots, gloves, or pants, opting for streetwear. This is a critical mistake. That denim jacket offers zero abrasion resistance; it will disintegrate in milliseconds in a slide. Your gear is an investment in your ability to walk away from an incident and continue riding. Buy the best you can afford, starting with the helmet. Your future self will thank you.
The Learning Process Explained
Mastering motorcycle control, especially braking, follows a natural progression. Understanding these phases helps you set realistic goals and track your development.
Phase 1 (Hours 0-5): Foundation. Your entire focus is on basic controls without stalling. Practice finding the "friction zone" of the clutch—the point where the bike begins to move—while walking the bike at walking speed. Work on gentle, smooth throttle roll-on and roll-off. Get a feel for the front brake lever and rear brake pedal pressure at very low speed. This phase is about building a basic neural connection between your intentions and the bike's responses.
Phase 2 (Hours 5-15): Low-Speed Competence. You're riding under 20 mph in a controlled environment. Now you practice coordinated braking—using both brakes together gently to come to smooth, straight stops. You'll begin simple turns, learning to look where you want to go. This is where you start to develop the "feel" for the bike's balance and weight transfer during braking.
Phase 3 (Hours 15-30): Street Fundamentals. You venture onto quiet residential streets. Here, you practice countersteering (pushing the left bar to go left), building cornering confidence, and basic hazard perception. Your braking practice intensifies, working on stopping quickly and smoothly from higher speeds (25-35 mph). You learn to scan intersections and anticipate potential dangers.
Phase 4 (Hours 30+): Skill Integration & Emergency Readiness. This is where true proficiency develops. You prepare for highway speeds, practice advanced braking techniques (the core of this article), and learn emergency swerving. Your skills become more automatic, freeing mental capacity for traffic strategy.
Throughout this journey, you will hit "plateau" periods where progress feels slow. This is completely normal. Muscle memory requires repetition. Frustration is part of the process. If you feel stuck, professional instruction (like an MSF Advanced RiderCourse) is invaluable. A qualified coach can spot subtle errors and provide drills to break through plateaus faster and safer than solo practice ever could.
Practical Skill Building
Knowledge is useless without practice. Here are specific drills to build your braking mastery. Always perform these in a large, empty, clean parking lot.
Parking Lot Fundamentals: Start with the basics. Practice figure-eights to master clutch-throttle coordination and looking through turns. Do slow-speed straight lines, focusing on balance without putting your feet down. For braking, begin with straight-line stops from 10 mph, focusing on smooth, simultaneous application of both brakes. Gradually increase speed to 20 mph, then 30 mph as you gain confidence.
Body Positioning & Vision: Where you look is where you go, especially during braking. Keep your head up, eyes on the horizon or your intended stopping point, not at the ground in front of the wheel. Grip the tank with your knees to stabilize your lower body, keeping your arms relaxed and elbows slightly bent. This allows you to control the bike without being jerked by the handlebars.
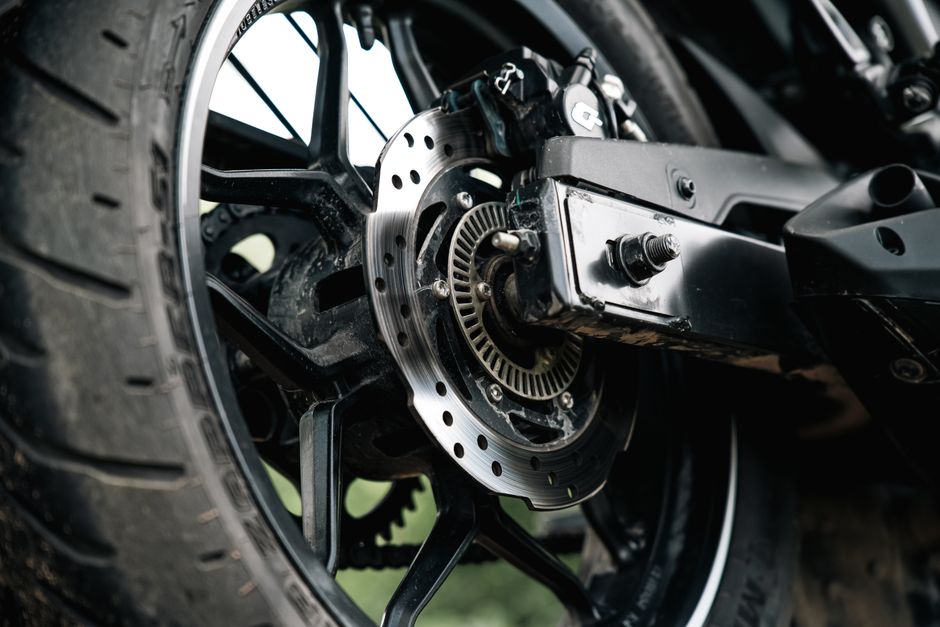
The Braking Drills: 1. Progressive Squeeze: From 20 mph, practice applying both brakes with increasing pressure, not a grab. The front brake lever should be squeezed like a ripe orange, not snapped like a trigger. Feel the weight transfer forward and the suspension compress. 2. Front vs. Rear Feel: In a safe, straight line at 15 mph, practice using only the rear brake to stop. Notice the longer stopping distance and potential for skidding. Then, practice using only the front brake smoothly. Feel the powerful stopping force. This teaches you the contribution of each brake. 3. Integrated Emergency Stop: The goal. From 20-25 mph, pick a marker (a painted line, cone). As you reach it, simultaneously: apply firm, progressive pressure to the front brake and firm pressure to the rear brake. Pull in the clutch. Keep your eyes up. Squeeze until stopped. Practice until this sequence is automatic.
Practice Routines: - 15-Minute Tune-Up: 5 min of slow-speed balance, 5 min of progressive braking from 15 mph, 5 min of quick-stop drills from 20 mph. - 30-Minute Session: 10 min of low-speed maneuvers, 10 min of progressive braking from varying speeds (15, 20, 25 mph), 5 min of swerve drills, 5 min of cool-down riding. - 60-Minute Comprehensive: Warm-up (10 min), Slow-speed precision (15 min), Emergency braking from 20, 30, and 40 mph (20 min), Combined braking-and-swerve exercises (10 min), Cool-down (5 min).
Common Beginner Challenges & Solutions
Every rider faces these hurdles. Recognizing and overcoming them is how you grow.
Challenge 1: Stalling at Stops. This is almost always due to releasing the clutch too quickly while in gear. Solution: Drill finding the friction zone. With the bike on its stand, practice slowly releasing the clutch until you see/feel the bike strain, then pull it back in. On the road, pull in the clutch fully as you come to a stop.
Challenge 2: Wobbly Slow-Speed Riding. Instability at low speeds stems from stiff arms, erratic throttle, and looking down. Solution: Relax your grip on the bars. Use steady, slight rear brake pressure (called "dragging") to stabilize the bike. Look ahead to where you want to go, not at the ground.
Challenge 3: Fear of Leaning. The bike feels like it will fall over. Solution: Trust the physics. In a parking lot, practice progressively tighter circles at walking speed, feeling the bike lean naturally. Look through the turn. The bike is designed to lean; fighting it causes instability.
Challenge 4: Panic Braking. The instinct is to grab the front brake hard, which can lock the front wheel or cause a crash. Solution: This is why we drill. You must replace the panic grab with the muscle memory of a progressive squeeze. Practice the integrated stop drill until it's your new automatic response.
Challenge 5: Highway Anxiety. The speed, wind, and traffic feel overwhelming. Solution: Gradual exposure. First, ride on fast multi-lane roads (50 mph) at off-peak times. Then, practice highway on-ramps and off-ramps. Finally, take a short highway trip at a non-rush hour. Focus on your lane position and maintaining a safe following distance.
Challenge 6: Group Riding Pressure. Feeling pushed to ride beyond your skill level to keep up. Solution: "Ride your own ride." It's your license and your life. A simple, "You guys go ahead, I'm going to take it easy back here," is all you need. Any experienced rider will respect this.
Challenge 7: Dropping the Bike. It happens to almost everyone, usually at a standstill. Solution: Learn the proper lift technique (turn your back to the bike, squat, lift with your legs). To prevent it, always point the front wheel straight when stopping, especially on a slope.
Decision-Making Framework
As a beginner, every choice matters. Use this framework to make smart, safe decisions.
Bike Selection: Your first bike is a learning tool, not a dream machine. Criteria: 300-500cc displacement is ideal for most adults—enough power for highways but forgiving. Weight should feel manageable when walking it; under 400 lbs wet is a good target. Seat height: you should be able to flat-foot or near flat-foot with both feet. Riding position: standard/upright is best for learning control and visibility. New vs. Used: A used bike from a reputable brand (Honda, Kawasaki, Yamaha, Suzuki) is highly recommended. It's cheaper, less heartbreaking if dropped, and holds value if you decide to upgrade.
Training Decisions: A Motorcycle Safety Foundation (MSF) Basic RiderCourse is the single best investment you can make. It provides structured learning on a provided bike in a safe environment. Private instruction can supplement this. Beware of learning solely from a friend—they may have bad habits and the dynamic can strain relationships.
Practice & Riding Decisions: Start in an empty lot. Progress to quiet residential streets, then busier local roads, then highways. Ride solo until you are fully confident with basic controls; this eliminates social pressure. Red flags that you're not ready for the next step: consistent stalling in traffic, inability to perform a controlled stop without looking at the controls, overwhelming anxiety that distracts you. Normal nervousness is fine; incapacitating fear is a sign to step back and practice more.
Timeline & Milestones
Here's a realistic roadmap for your first year. Your mileage may vary based on practice frequency, natural aptitude, and prior experience (e.g., cycling helps).
Week 1: Controls familiarity. Competent in a parking lot: starting, stopping, turning, and basic braking without stalling. Weeks 2-3: Confidence on local streets. Able to navigate stop signs, traffic lights, and gentle curves while maintaining lane position and scanning. Month 1: Comfortable with solo short trips (under 30 minutes) to familiar locations. Beginning to adapt to different weather (light wind, sun glare).
Months 2-3: Highway introduction. Able to merge, maintain lane discipline at speed, and execute planned lane changes. Starting longer distance rides (1-2 hours). Month 6: Comfortable commuting in traffic. May participate in a small, casual group ride with an understanding leader. Emergency braking and swerving drills are a regular part of practice. Year 1: Consider advanced training (like an MSF Advanced Course or track-based instruction). May be ready for multi-day touring with proper planning. The fundamentals are now subconscious, freeing you to enjoy the ride more fully.
Variables: Practicing 2-3 times per week accelerates progression dramatically. Prior cycling experience helps with balance and countersteering intuition. Higher anxiety levels may slow the timeline, and that's okay—slow and steady wins the race. Warning signs of rushing: Skipping foundational drills, moving to complex traffic situations while still struggling with basic controls, or ignoring feelings of being in over your head. A healthy challenge feels slightly uncomfortable but manageable; panic is not a teaching tool.
The Mental Game
Riding is as much a mental discipline as a physical one. Managing your mindset is crucial for safety and enjoyment.
Managing Fear: A healthy respect for danger is essential, but paralyzing fear is dangerous. Acknowledge the fear, then use it to motivate disciplined practice. Instead of "I'm scared of that curve," think, "I need to practice my cornering technique in a parking lot." This turns fear into actionable improvement. Situational Awareness: Develop a constant scanning habit. Use the "12-second lead time" rule: look 12 seconds ahead on the road to identify potential hazards early. Regularly check mirrors every 5-8 seconds. Know your escape routes at all times.
"What-If" Planning: Actively predict scenarios. "What if that car at the side street pulls out?" "What if the truck ahead drops debris?" This mental rehearsal prepares your brain to react more calmly if it happens. Confidence vs. Complacency: Confidence comes from knowing you have practiced your skills. Complacency is when you stop practicing and start assuming nothing will go wrong. The former saves you; the latter endangers you. Never stop drilling the basics.
Visualization: Off the bike, mentally rehearse perfect emergency stops, smooth cornering, and hazard responses. Neuroscience shows this strengthens the same neural pathways as physical practice. Handling Close Calls: After a near-miss, analyze it calmly. What could you have done differently (position, speed, anticipation)? Learn from it, then let the adrenaline go. Don't let it haunt you. The "click" moment—when the controls become second nature and you feel truly connected to the bike—is a profound shift. It doesn't mean you're done learning; it means you're ready to learn even more.
Insider Tips From Experienced Riders
We surveyed veteran riders for the wisdom they wish they'd had on day one.
"I wish I'd taken professional training sooner, not just the basic course. It fast-tracks skill development in a way years of street riding might not." – Maria, 12 years riding.
"Underrated skill: Smoothness. Smooth throttle, smooth brakes, smooth steering. Speed comes from smoothness, not aggression. A smooth rider is a fast, safe rider." – David, track instructor.
"My early regret was buying a bike that was too heavy and powerful. I was intimidated by it for a year. Start small, master it, then move up. The fun is in the riding, not the boasting." – Chris, 8 years riding.
"Maintenance habits start day one. Check tire pressure every week. Learn to lube and adjust your chain. It keeps you connected to the machine and prevents catastrophic failures." – Alex, mechanic and rider.
"Attitude is everything. The riders who think they know it all are the most vulnerable. The safest riders are perpetual students." – Samantha, 20 years riding.
"Around the 10,000-mile mark, you have enough experience to truly understand how much you still have to learn. It's humbling and exciting. For the early phase: be patient with yourself. Every expert was a beginner who didn't quit." – Michael, 15 years riding.
FAQ for Beginners
How do I overcome the fear of dropping my bike?
First, accept that it might happen, and that's okay. It's a common rite of passage, usually at zero mph. Practice the proper lifting technique in advance so you feel prepared. Invest in frame sliders or engine guards; they can minimize damage and ease your mind. Ultimately, the fear diminishes as your low-speed control improves through practice. Focus on your skills, not the "what if."
What's the minimum gear I need to start practicing in a parking lot?
Absolute minimum: A DOT/ECE-certified full-face helmet, sturdy over-the-ankle boots (like work boots), full-fingered gloves (leather or abrasion-resistant), a long-sleeve jacket (denim or better, leather ideal), and durable pants (no shorts or sweats). This is for low-speed lot practice only. For any street riding, you need purpose-built motorcycle gear with armor.
How do I know when I'm ready for the highway?
You are ready when you can: execute smooth, controlled stops from 40+ mph without anxiety; maintain a steady lane position without wandering while checking mirrors; perform planned lane changes confidently; and merge using proper throttle control and head checks. Your basic controls should be completely automatic, freeing your focus for traffic flow and high-speed hazards.
Is it normal to feel overwhelmed at first?
Absolutely. It is 100% normal. You are processing a massive amount of new sensory information and physical coordination. Feeling overwhelmed means your brain is engaged. It will pass with consistent, short practice sessions. Break learning into tiny chunks—master one thing per session (e.g., "today I work on smooth stops"). The feeling will transform into focused engagement.
How much should I spend on my first motorcycle?
For a used, beginner-friendly motorcycle (300-500cc standard), plan on spending between $3,000 and $5,000 from a private seller or dealership. This range typically gets you a reliable, well-maintained machine that's 5-10 years old. Factor in another $1,000 for taxes, registration, and a professional inspection before purchase if you're buying privately.
Can I learn to ride if I'm not mechanically inclined?
Yes, you can learn to ride. Modern motorcycles are very reliable. However, you must commit to learning basic, critical maintenance for safety: checking tire pressure and tread, checking and adjusting chain tension/lubrication (if chain-driven), checking fluid levels, and understanding warning lights. You don't need to rebuild an engine, but you are responsible for the machine's roadworthiness.
What if I have a close call or minor drop—should I quit?
No. A close call is a powerful learning tool if you analyze it constructively. What was the cause? What could you have done differently (speed, position, anticipation)? A minor drop is a lesson in control, not a failure. Almost every rider experiences these. The key is to get back on as soon as possible (after checking bike and body) to rebuild confidence. Use it as motivation to practice the specific skill that was lacking.
Conclusion
The journey from your first wobbly parking lot ride to executing a confident, controlled emergency stop is one of the most empowering transformations you can undertake. It's a path built not on innate talent, but on deliberate practice, humility, and a commitment to safety. You now have the blueprint: understand the physics, drill the skills, equip yourself properly, and cultivate the right mindset. The road ahead is long and rewarding. Your next step is not to buy the flashiest bike, but to sign up for a Motorcycle Safety Foundation Basic RiderCourse. That single action sets your entire journey on the right track. Embrace the process with patience. Celebrate the small victories—the first smooth stop, the first successful corner, the day the controls simply "disappear" and it becomes just you and the ride. Remember, the expert rider waving to you on the highway started exactly where you are now: heart pounding, mind racing, filled with a mix of fear and determination. They practiced, they learned, and they transformed. You can too. Now, go build that confidence, one brake application at a time.


No comments:
Post a Comment