How to Pack for a Hiking or Trekking Trip
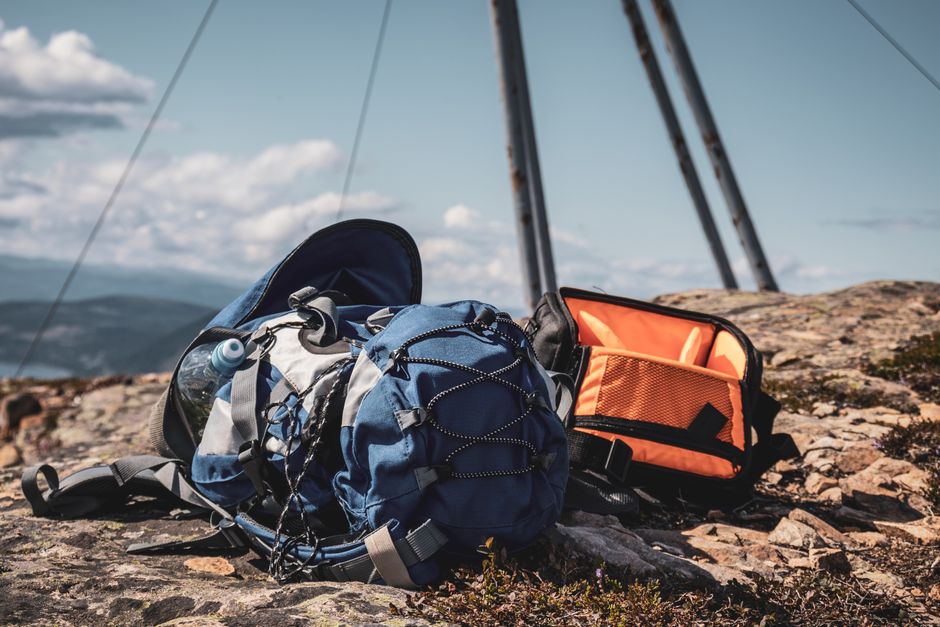
That moment when your pack touches the scale at check-in and you realize you've made a terrible mistake — and the trail hasn't even started yet.
🧩 Who this solves for: First-time trekkers, weekend hikers, and anyone who's ever wrestled a 22kg pack onto a bus in Kathmandu.
⏱ When to use this advice: 48 hours before departure — the window between "I'll figure it out" and panic.
💪 Estimated effort: 3/5 (the mental work is harder than the physical sorting)
💰 Cost range: $50–$200 if you already own basics; $400–$800 if starting from scratch
⚠️ Risk level: Moderate — wrong packing can ruin knees, morale, and trip budgets
⏳ Time saved: 6–10 hours of repacking, border hassle, and gear-store panic buys
My first multi-day hike was a disaster of my own making. I stood in the departure lounge at Pokhara airport, my 65-liter pack bulging like a sausage casing, and watched a Nepali guide named Raju lift it with one hand, raise an eyebrow, and say quietly: "Madam, you are carrying your house."
He wasn't wrong. I'd packed three pairs of jeans. A hardback journal. A full-size toiletries bag with things I'd read about in a magazine that shall remain nameless. And — I'm not proud of this — a ceramic mug because I liked the weight of it in my hands.
That pack weighed 18 kilograms. By day three on the Annapurna foothills trail, I was bargaining with a porter who wanted $12 a day to carry it. By day four, I'd paid him $15 and felt like a failure. But here's the thing: I learned. Every gram I shaved off after that trip came from a real mistake, not a gear list copied from some forum where people argue about the perfect sleeping pad at 3am.
This article is what I actually use now — the gear that works, the weight tricks that save your back, and the hard-won truth that most "essential" packing lists are written by people who don't carry their own bags up a mountain.
Why This Problem Ruins Trips (And Why Most Advice Fails)
The hiking-packing problem isn't actually about gear. It's about fear. Fear of being cold. Fear of being hungry. Fear of getting blisters and not having the right patch. So you pack for every possible disaster, and your bag becomes a moving pharmacy-slash-wardrobe-slash-hardware store.
Most advice fails because it skips the real negotiation: you vs. your own anxiety. A blog tells you to bring a "lightweight down jacket" but doesn't tell you that a $40 Uniqlo packable down works just as well as a $300 Patagonia one for 90% of trekkers. Another says "always carry 3 liters of water" but you're hiking in the Alps where there's a fountain every 40 minutes.
I once watched a German tourist unpack four different headlamps at a refugio in the Dolomites. Four. He'd read five different guides and couldn't decide which one was "essential," so he brought all of them. That's not packing — that's anxiety wearing a backpack.
The real root cause is simple: we overestimate the variability of the trail and underestimate our own resourcefulness. The trail provides. Refugios, teahouses, campgrounds, and fellow hikers have been solving these problems for decades. You don't need a backup for your backup.
🧢 Pro Tip: The 3-Day Rule
Lay out everything you think you need. Remove half of it. Now ask yourself: "If I didn't have this, would I die, get seriously injured, or have a truly miserable time?" If the answer is no, it stays home. I've used this rule on 14 treks across 8 countries and never once regretted what I left behind.
The Step-by-Step Solution
1. The Shell Game: Your First 3 Layers
Base layer: one long-sleeve merino wool top (250g, $60–$80). You'll wear it every day. Wash it in a sink. It won't stink like synthetic. I use the same Icebreaker shirt for a week straight and only my hiking partner knows the truth. Do not bring cotton. Cotton kills is not a slogan — it's a fact. Once wet, it stays wet, and your body temperature drops like a stone.
Mid layer: a 100-weight fleece or a thin synthetic puffy. I use a $35 Decathlon fleece that's lasted five seasons. It's not sexy. It works. If the temperature drops below 5°C, I add a $99 Uniqlo down vest underneath. That combo handles anything from summer alpine mornings to autumn ridge lines.
Outer shell: a waterproof jacket with pit zips. Not a $600 Arc'teryx — a $120 REI Co-op or Columbia jacket with sealed seams and a hood that actually stays on in wind. Pit zips are non-negotiable. If you don't have them, you'll unzip the front, let rain in, and get wet anyway.
Your total weight for the three layers: about 800 grams. That's less than a single pair of jeans.
2. The Legs Have It (And What Goes On Them)
One pair of hiking pants — stretchy, quick-dry, with a zip-off leg option if you're going somewhere warm. I paid $55 for a pair of Craghoppers in a Kathmandu shop and they've done the Everest View trek, the Larapinta Trail, and a wet October in Patagonia. One small hole near the left knee from a barbed wire incident in New Zealand. Still wearable. Still functional.
For sleeping: a pair of lightweight leggings or thin long johns. That's it. You don't need "camp pants" and "sleeping pants" and "emergency pants." One active pair, one sleep pair.
Underwear: two pairs of synthetic or merino briefs. One wears, one dries on the back of your pack. That's a system that works from the Inca Trail to the Camino de Santiago.
3. Feet First (Where Most People Get It Wrong)
Shoes are the one place you don't save weight by going cheap or light. I watched a guy on the Tongariro Alpine Crossing try to do it in trail runners with no ankle support. He twisted his ankle on loose scree at kilometer 4 and spent the next 8 hours hobbling on a swollen joint. Don't be that guy.
For anything with a pack over 8kg or terrain with rocks, roots, or scree: get mid-height boots with a Vibram or similar sole. I wear a pair of Salomon X Ultra 4 Mid GTX. They're about $180 — expensive but worth every dollar when you're crossing a boulder field in drizzle.
Socks: one pair to wear, one pair to dry. Darn Tough merino socks ($25) have a lifetime guarantee. I've sent back three pairs over seven years. They replace them no questions asked. That's not a sponsorship — that's a relationship.
Blister prevention: leukotape, not moleskin. Moleskin shifts and bunches. Leukotape stays on for three days through mud and stream crossings. Apply it before the hot spot forms. Trust me.
4. The Weight Witchcraft: 7 Things to Leave Behind
- 🥤 That heavy Nalgene bottle. Swap for a 1L Smartwater bottle (35g vs 180g). The threads fit most water filters. You save 145g per bottle. Carry two and you've saved nearly 300g.
- 📖 A physical book. You're not going to read it. You're going to be too tired. Kindle app on your phone or a $50 used e-reader in a ziplock bag.
- 🔦 More than one headlamp. One good one with a red-light mode. Black Diamond Spot 400 ($40) has never let me down.
- 🧴 Full-size toiletries. Decant into 30ml dropper bottles. Toothpaste tabs instead of a tube. Dr. Bronner's soap for everything — body, hair, laundry, dishes.
- 🧹 A towel bigger than a bandana. A Sea to Summit Airlite towel (40g, $18) dries you off. You're not at a spa.
- 📸 A separate camera if your phone camera is decent. My iPhone 13 takes photos good enough for Instagram, prints, and my mom's fridge. The 2kg DSLR stays home unless I'm getting paid.
- 🥄 A full cooking setup for solo treks. If you're staying in refugios or teahouses, you don't need a stove. I carried a Jetboil for 6 days in the Pyrenees and never used it. That's 400g of regret.
5. The Pack Itself And The Holy Grail Of Weight Distribution
Your pack should weigh no more than 20% of your body weight at the start of the day. I'm 65kg. That means 13kg max. My fully loaded pack for a 7-day trek with no resupply is 11.5kg including water. That's a 13.5kg savings from my first trip — basically the weight of a small dog I was carrying for no reason.
Packing order: heavy stuff (water, food, stove) goes high and close to your spine. Light stuff (sleeping bag, puffy jacket) goes low. Rain jacket and first-aid go in the top pocket. You don't want to unpack your entire life to find a Band-Aid in a hailstorm.
I use an Osprey Exos 48 (1.1kg, $190). It's basically a frame with a sack attached. Not the most durable, but I've put 2,000km on mine and the only damage is a torn mesh pocket from a bush in Tasmania.
Pro Tips From Someone Who's Been There
1. The "Dry Bag Within A Dry Bag" Trick. Your sleeping bag goes in a waterproof stuff sack. That sack goes inside a larger dry bag with your sleep clothes. Even if your pack falls in a river (I've done this), your sleep system stays dry. Cost: $12 for two dry bags from Decathlon. Saved my sanity in Scotland.
2. Ziplock bags are your real MVPs. I organize everything in gallon-size freezer bags labeled with a Sharpie. Socks. First-aid. Electronics. Toiletries. When the tent gets rain-spray at 3am, you can find exactly what you need without a headlamp search. Weight cost: 12g. Sanity value: incalculable.
3. Eat dinner before you buy food for the trail. I wandered into a grocery store in Chur, Switzerland, hungry, and bought 2kg of food I didn't need. Chocolate, dried sausage, extra crackers. I carried that weight for three days through the Alps before I gave half of it to a French couple who looked equally overwhelmed. Shop after a meal, not before.
4. Put your sleeping bag in the pack liner first, then everything else around it. This keeps the bulkiest item compressed at the bottom and creates a stable base. It also means your bag stays dry even if the pack gets soaked. Learned this from a guide in Slovenia who'd been leading trips for 22 years.
5. Start your trip with wet wipes in a ziplock, not a towel. A pack of 20 biodegradable wipes weighs 60g. They're for face, feet, and the "I fell in mud" moments that happen more often than you think. One pack lasts 5 days if you're disciplined.
🚫 Real Traveler Mistake: The Overpacker's Bait
I once bought a "multi-tool" in a souvenir shop in Sapa, Vietnam. It had a knife, scissors, can opener, screwdriver, bottle opener, and a tiny saw. It weighed 140g. In 11 days of trekking, I used the scissors once — to cut a loose thread. The rest of it was dead weight. If you need a knife on trail, bring a single Opinel No. 7 (30g, $15). It cuts cheese, opens packages, and doesn't pretend to be a Swiss Army repair shop.
Common Mistakes Travelers Make With This Issue
❌ Mistake 1: Buying everything new for one trip. I see it all the time — a whole Patagonia kit purchased for a single 5-day trek. Gear doesn't work its best the first time. Break in your boots with 3 walks of at least 10km each. Take your tent to a park and set it up in the dark. The trail is not the place to discover that your rain jacket doesn't have pit zips.
❌ Mistake 2: Forgetting the "camp clothes" problem. You're sweaty at the end of the day. You put on clean dry clothes. That's great. But if you wear your camp clothes to sleep in, they get damp from your body heat. In the morning, you have to put on damp clothes. That's miserable. Solution: sleep in your base layer and keep one separate dry set strictly for sleeping. Learned this the hard way at a freezing campsite in the Blue Mountains.
❌ Mistake 3: Overestimating resupply options. On the GR20 in Corsica, the refugios sell basic supplies — but only until 5pm and only if the guardian feels like opening the door. I assumed I could buy snacks on-trail and ended up eating plain pasta for two days. Check resupply reliability before you go. A single granola bar per day is not a plan.
❌ Mistake 4: Ignoring the "sag factor." A new sleeping bag might weigh 800g and compress to the size of a football. But after 50 nights, the loft degrades and it compresses less. Your pack volume increases. Check your gear's actual compressed size before you rely on "spec sheet" numbers. I had to strap my sleeping bag to the outside of my pack for 3 days in Tasmania because it no longer fit inside.
Your Quick-Action Checklist
- ✅ Weigh your pack at home. If it's over 20% of your body weight, remove items until it's not.
- ✅ Wear your boots for 30km minimum before departure — blisters discovered at home are a gift.
- ✅ Put everything in labeled ziplock bags. Group by category: sleep, cook, first-aid, repair, hygiene.
- ✅ Download offline maps on your phone (Gaia, AllTrails, or Maps.me) AND bring a paper map in a waterproof case.
- ✅ Tell someone your route. Not a generic "I'm going to the mountains." The actual trail name, your start date, your expected finish, and your emergency contact number.
- ✅ Pack your first-aid kit last. Not because it's least important — because it's the one thing you'll need when everything else is buried.
- ✅ Take a photo of your ID, insurance card, and passport and email it to yourself. Also write the numbers on paper and stash them in a ziplock inside your pack.
Frequently Asked Questions
Q: What's the single best weight-saving swap I can make?
A: Replace your water bottle with a 1L Smartwater bottle and your sleeping bag with a quilt-style bag. The bottle saves 145g and the quilt saves 300-500g compared to a traditional mummy bag. Together, that's nearly half a kilogram — more than almost any other single change you can make.
Q: Do I really need a dry bag for everything?
A: No — you need one dry bag for your sleep system and one for your electronics. Everything else can go in a pack liner. I use a 35L trash compactor bag (2 for $5 at a hardware store) as my main pack liner. It's cheaper than a dry bag and just as waterproof. The trick is to twist the top and tie it off, not just scrunch it.
Q: How many pairs of socks do I actually need?
A: Two pairs — one to wear, one to dry on the back of your pack. On a 7-day trek, you'll be in the same socks for 3-4 days at a time. It's fine. Your feet won't explode. Rinse them in a stream when you can. I've gone 6 days on the Snowman Trek in Bhutan with one pair and only mild regret.
Q: Is it worth buying a $200 backpack vs. a $60 one?
A: For any trip over 3 days or 15km, yes — but only if it fits your torso length. A properly fitted pack transfers weight to your hips, not your shoulders. The wrong pack, even an expensive one, will hurt. Go to a store with a trained fitter. The Osprey Exos 48 and Gregory Zulu 40 are both reliable options. Try them loaded with 10kg before you buy.
Q: What food should I pack for no-cook trail meals?
A: Tortillas, hard cheese, salami, peanut butter, dried fruit, nuts, and a chocolate bar. That combination gives you protein, fat, carbs, and calories without needing a stove. I ate that for 5 days on the Queen Charlotte Track and didn't get bored. For hot meals without a stove, bring a wide-mouth thermos and fill it with boiling water at the last refugio.
Final Word: You've Got This
Here's the truth that no gear list will tell you: your pack will feel heavy on day one. Your shoulders will ache. You'll wonder why you brought the extra pair of leggings. By day three, your body will adapt. The weight becomes part of you. What felt like a burden becomes a rhythm.
And then you'll crest a ridge at sunset, and the valley below is lit gold, and the air smells of pine and distance, and you'll realize that the only thing that matters is that you're there — not what you brought.
Pack light. Walk far. Trust yourself.
📌 Save this guide — screenshot it, bookmark it, or share it with someone who's about to overpack for their first big hike.
What's your best weight-saving trick? Drop it in the comments below — I read every single one.


No comments:
Post a Comment